

Originally published in The Village Square - June 2010
Introduction
For those of you who like to scroll saw, you know how tedious it can be to cut around very small pieces. After years of wear (and sometimes even weeks) the hole in your scroll saw table gets scuffed and enlarged from repeated rubbing of the blade. This occurrence is not generally due to user error, but is what I would refer to as the nature of the beast. In my 13+ years of scroll sawing, it is rare that I come across a scroll saw table that doesn't have this type of wear soon after its initial use.
For the most part, this does not interfere with production, but when cutting small, delicate pieces it can cause the problem of lack of support as well as losing the piece as it is cut off. In order to rectify this, many scrollers make what is referred to as a zero clearance plate for their saw. The purpose of the zero clearance plate is to provide better support for small and delicate pieces, as well as avoid losing them in the pile of sawdust underneath.
There are several ways you can make this add-on for your saw. I will be focusing on what I feel to be the easiest, quickest (albeit, temporary) method of making this plate. It is a great quick fix for those of you who don't need or want a more permanent type or don't want to use it all the time, and can be installed in less than five minutes.
Assembly
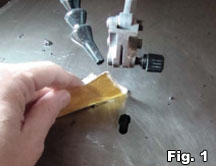
- First of all, make sure your scroll saw table is clean. Give it a spray with WD-40 and use some fine grit sandpaper to clean any adhesive or debris that may have collected on it. (Fig 1)
- After sanding, use a paper towel to clean off the WD-40. This will leave the surface slick and oily. You will now need to use Windex or another window cleaner or alcohol to remove the oily residue. You want the table as clean and grease free as possible.
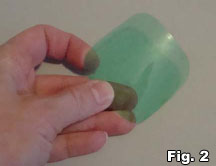
- Next, take an empty two liter pop bottle and cut a rounded rectangle from the plastic. The rectangle should be about three inches square with rounded corners. (Fig 2)
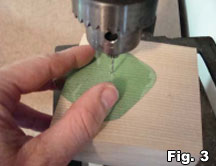
- Use your drill press and a small bit (about 1/16th of an inch) to drill a small hole in the center of the plastic piece. (Fig 3)
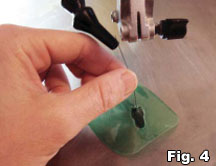
- Go to your scroll saw and place a small blade in the blade holder. Release the top of the blade and thread the plastic piece through, curved side down.
- Reattach the blade and tighten the tension. (Fig 4)
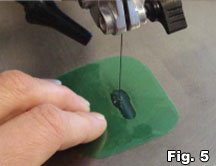
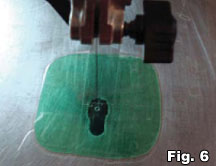
- Square out the plastic and use clear packaging tape to tape the plate into place. I use strips of at least 6" long. Place four stripes two vertical to each side of the blade and two horizontal at the front and back of the blade. Do this carefully so you don’t get any wrinkles in the tape which would interfere with your cutting.(Figs 5 & 6)
There you have it! An easy, effective and quick zero clearance scroll saw table!
Conclusion
I found that this type of plate works great. After a few projects, the hole does start to get bigger and sometimes the tape will roll up slightly at the edges after a bit of use. If this occurs, I just take a sharp scraping knife and trim off the loose edges of the tape. After a while, I replace the plate, cleaning my table as stated before.
Even though I need to replace the plate periodically, I still use this method as opposed to a more permanent one because it is inevitable that even on wooden overlay plates which are popular, the hole will show signs of wear and get larger. Also with a wooden plate, you are raising the surface of your table the thickness of the wood and this could affect the performance of reverse-tooth blades, which I use often.
Many people also use this method using old credit cards or other plastic, but I found that they are a bit thicker than the pop bottle plastic and form a ridge which causes problems when feeding delicate work through. I keep a several blank plates in my supply drawer, as I cut anywhere from four to eight of them from a discarded pop bottle at a time, which lasts a while.
I hope you try this method and it works well for you. If you have any questions or comments about this article, please contact me at the email address below and I will be happy to assist you.
If you have any questions regarding this project, please email me at sheilalandrydesigns@gmail.com. You may also see and purchase other patterns at www.sheilalandrydesigns.com and download free articles and a catalog of my designs.
Come join me on Facebook at Sheila Landry Designs Scroll Saw Art! See previews and updates of articles and projects.

Recommended Comments
Join the conversation
You can post now and register later. If you have an account, sign in now to post with your account.
Note: Your post will require moderator approval before it will be visible.