


rafairchild2
-
Posts
593 -
Joined
-
Last visited
-
Days Won
27
Content Type
Store
Profiles
How-To & Articles
Scroll Saw Reviews
Clubs & Organizations
Clubs & Organizations International
Pattern Shop
Suppliers
Village University
Help Desk
Forums
Gallery
eBooks
Everything posted by rafairchild2
-
I find, going slow is a good thing. Take your time when cutting, enjoy the process, and concentrate on nailing your guidelines. This will help you later on if you decide to do intarsia. Slow and steady wins the race! By nailing your lines, you reduce/eliminate recuts, and also additional fitting.
-
 Just so everyone knows... I am NOT trying to rekindle anything after 43 years. Just wanted to make that very clear. I am one-and-done. That being said, I have been able to maintain civil communication with a number of ex-girlfriends from my younger years. I count them as friends. Nice to know one can maintain a friendship for so many years.
 -
This is a post I did on my personal site. I thought this would be a good place to share it. And in some ways, it is a brag... after overcoming a not so brag from 40+ years ago. This all came to conclusion a week ago when Tara received my gift. Recently, Tara sent me a photo of the wooden gift I made for her back in High School over 40 years ago. I think we were sort of boyfriend/ girlfriend back then. I was 17 1/2, she was a sophomore at 15 y/o. But for sure, I couldn't help but laugh at the thought of my teenage self. A painted red pair of hearts cut out of wood? And did you notice, it was NOT my note on the backside. I didn't even sign it or put anything on the back. Yeah, uncouth and an amateur at "love". But as I was looking at the hearts... man, I had a steady hand! Most likely done on the HS shop bandsaw. Maybe lacking a bit of creativity, but a solid cut! But that burn line!!! Barf-o-matic! Seriously? A teen's attempt at "love"? Really? Was that the best I could come up with for Valentine's Day? I mean, I was no Michelangelo, but surely, I could have done better. Not even my handwriting on the back... Man was I a dummy back then. But then, as I looked at the photo, another thought popped into my head. Maybe I could redeem myself with an Intarsia gift - you know, something fancy and intricate that would show off my current woodworking skills (or lack thereof). Now, for those who don't know, Intarsia is a technique where you fit together small pieces of wood to create a pattern or design. It's like a jigsaw puzzle, but with wood. And let me tell you, it's not easy. In fact, it's downright frustrating at times. But hey, if it means impressing Tara 40+ years later, I'm willing to give it a shot. Of course, before she sent the photo there was a part of me that wondered if Tara even remembered the wooden hearts, I gave her. Maybe she tossed them in the trash as soon as I turned my back. Let's say, back then I was a bit of a putz. Well, one day she mentioned to me on Facebook that her mom had them in storage at her childhood home away in the attic. As I looked at the photo and was writing her a thank you note a thought came to mind. Perhaps she'll appreciate the effort to make her a new, improved gift. And who knows? Maybe this Intarsia creation will be the thing that makes her think, "Wow, this guy really knows his way around a piece of wood." So, wish me luck, folks. I'm off to create more Intarsia, and hopefully make up for my teenage lack of creativity and lack of couth. And if it doesn't work out, well, at least I'll have a good story to tell. Here is the starting work. The selection of wood (and this still has two or three more species added), and everything then cut out. . Edited to add an image of the completed project shipped to Tara. Yes... She loved it.
- 11 replies
-
- 12
-

-
Wooden Shapes Puzzle for my little boy
rafairchild2 replied to WoodenEngineering's topic in Bragging Rights
What an excellent idea, and great execution. I love the simplicity and elegance of it. I just had an idea, that you can do a series of these. Shapes as you have, but also do: Letters, animals, fruits/vegetables, vehicles, even states and countries. The possibilities are endless. Below is one of my designs, that I executed on my laser as a proof of concept. This could also be cut via scroll saw, as each letter you have a little knockout for your finger, this is where you could drill your pilot hole for the pierce cutting. The only thing with mine is I also included different images to go with each letter. The puzzle below is going to be a gift for a friend of mine in Taiwan for his daughter. I met him when I was working with the Taiwanese Army over a 5-year period, and he was my translator the first two times I was in-country. He of course is teaching his 3 y/o English, so I designed this to send him. Can anyone guess the "Y"?
-
I had debated about that. Being that adding a logo could be considered a "brag", I took the shot and posted it here.
-
Perhaps it's the years I did marketing and advertising sticking around my head. Perhaps it's a bit of a way to brag. On my larger pieces, I put my logo on the back (backer board) using my laser. For my gifts, I add a signature and date below. Some may say it is a bit ostentatious, but I like to have a legacy mark on my work. Below is a backer board I am prepping for glue-up, I will also drill pilot holes for my hanging hardware next. So, who else places a logo on their pieces, and what method do you use? ps: Attach your logo.

-
You don't do that to the whole piece but in this case the ring. It adds a bevel, that really accents things. it does not take much. Think of it as doing what a router does, just not as fancy.
-
From the description, it says he has "magnets behind." I would drill a small hole deep enough to take the small magnet, but not deep enough to drill through the square. Of course, you would do the same thing with the playing piece, just have the opposite polarity. It would be a lot of drilling nearly 100 holes! The seller (Serhan) is from Turkey. I forgot if it was Istanbul or Ankara. Nice guy, his scroll saw plans are great and priced very reasonably too. This is what I use for magnets on my projects. I get a pack of 60 Mini Magnets for $6. https://amzn.to/3O7Zekd
-
I got this off of Etsy. Six wheeled animals in the plans. This is a recent set I cut out. Not sure if these are too simple for a 3-year-old, but the 2-year-old my wife babysits for loves them. I made a set for my grandson (but he's too young right now), and I have been making more to give as gifts to people who are just having kids.
-
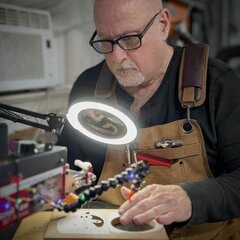
I was working on my Intarsia project today, finally finished cutting the horse on the right (see below), and started some of the power carving. Sadly, the rotary flex cable broke as I was working, so I need a new part. Only $13 and it comes in tomorrow, but it set me back on that project. It is a key rack, that will be a birthday gift for my sister. Needless to say, I wanted to occupy my time today, so I cut this out. About 5 hours of scrolling for this. A bit of detail work and pierce work (Drill and cut inside). Still need to profile the edges and give it a good sanding, but wanted to fit the clock mechanism to make sure my tolerances were good. I had to make some on the fly design changes while cutting. I am reworking the design now for future pieces. I was asked if I would sell this, but I do not think I could justify the price. 7x8" @$1.5/inch would be about $85. I know I have $20 in it. And so far about 5 hours of my time. I cut slowly as I am anal about nailing my pattern lines. Plus I had to do some on the fly while cutting design changes. BTW, this is my current Intarsia project. It will be a gift for my sister. Currently finished cutting it out, shaped the left horse, now on to the right horse.
- 4 replies
-
- 10
-
-
Alex has some great patterns. I am amazed that he is still producing things as he comes from Ukraine.


