


OCJoeR
-
Posts
11 -
Joined
-
Last visited
-
Days Won
1
1 Follower

OCJoeR's Achievements

Newbie Scroller (2/11)
18
Reputation
-
 multitom reacted to a post in a topic:
New to the forum
multitom reacted to a post in a topic:
New to the forum
-
 barb.j.enders reacted to a post in a topic:
Unicorn
barb.j.enders reacted to a post in a topic:
Unicorn
-
That looks great Barb. What book did you get the pattern from?
-
 OCtoolguy reacted to a post in a topic:
New to the forum
OCtoolguy reacted to a post in a topic:
New to the forum
-
Hey Ray, Thanks for the welcome. Nice to meet another OC member.
-
 Mike Crosa reacted to a post in a topic:
New to the forum
Mike Crosa reacted to a post in a topic:
New to the forum
-
OCtoolguy reacted to a post in a topic:
New to the forum
-
OCtoolguy reacted to a post in a topic:
New to the forum
-
OCtoolguy reacted to a post in a topic:
New to the forum
-
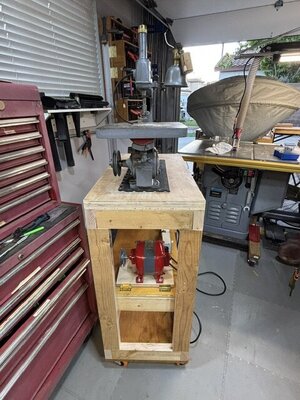
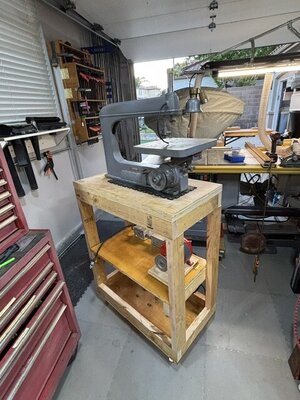
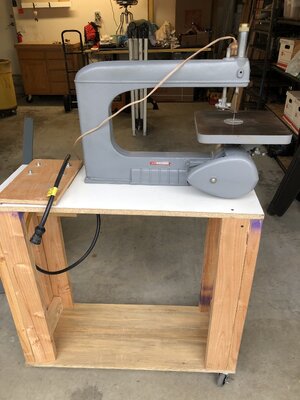
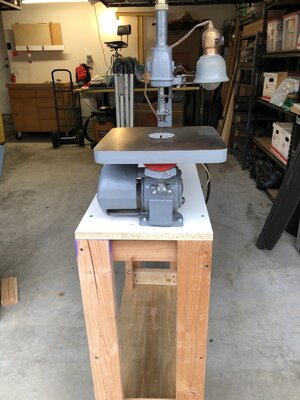
I got the new stand built yesterday, now it needs to be sanded and finished. I moved the motor to under the saw for more stability. It seems to be pretty stable but I think I'm going to throw some weights in the bottom section for even more. I have to cut the hole in the top for the belt. I'm going to have to either find someplace to buy new gaskets for the crankcase, (it's leaking oil) or use some RTV on the covers. I've been watching some videos on basics and making those name puzzles for kids ant they sound like a good starting project.
-
OCtoolguy reacted to a post in a topic:
New to the forum
-
Thank you Mike. I enjoy doing restorations on the old machines. That's pretty much all I have in my shop. Other than me I think the scroll saw is the oldest power tool in the shop.
-
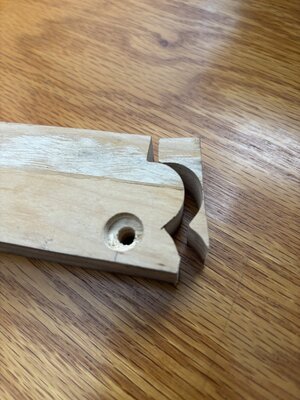
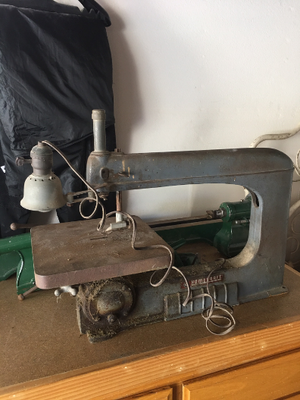
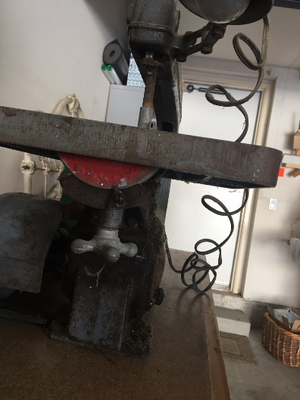
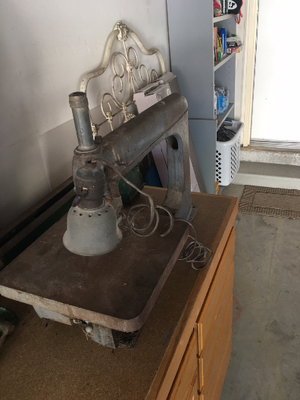
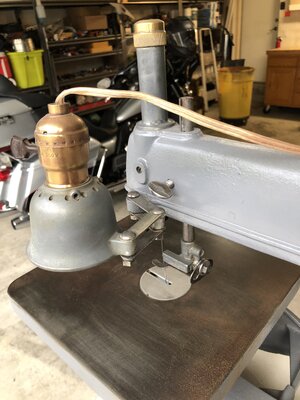
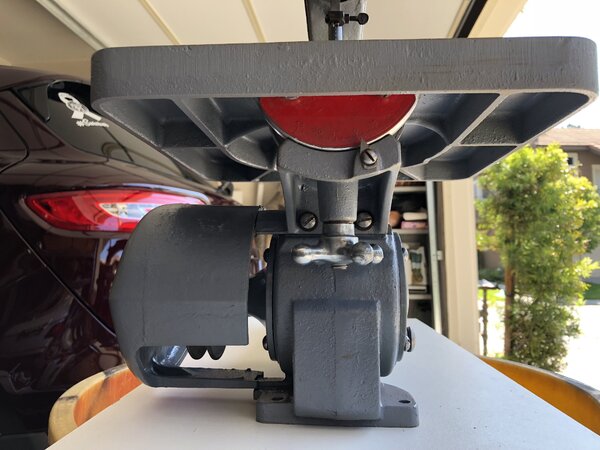
After some more fiddling I moved the hinges back an inch or so and put the 1.5" pulley on the motor, that gave me about 535 spm. Changing back to the 3.5" motor pulley was pretty easy with the motor mounted on the hinged plate. I made some adjustments to the belt links so I was able to use both pulleys without changing the belt length. I put a 5/16" bolt through the motor plate and into a T nut under the main table so I could keep the motor plate from bouncing around. At full speed I was able to make the below cut. It's nothing fancy but at least I was able to make some cuts with the saw now. I can see what you all mean about the saw dust blocking the line you are cutting on. I was able to hold the hose that is connected to the little blower hole in the top of the saw and it did blow almost all the saw dust away but it's not exactly the way it's supposed to work. I'll have to make a Home Depot run to see what else I can find. The other though I had was to connect a 2.5" line from my dust collector to the saw. I have one of those flexible tubes that holds it's shape once you bend it on my drill press and it works great. I can direct the hose right where I'm drilling and it pretty much pulls all the shavings and dust out. It works especially well for drilling with Forstner bits that make tons of shavings. I'll have to see how I can hook it up to the scroll saw and see if it works as well. By the way, neither of the variable speed controllers worked with this motor. The one was real finicky and the other started overheating the motor, so I'm going with the 2 pulleys. I also rigged up the light with LEDs. Much better lighting than the old incandescent bulb. Now that everything is working well I'm going to take all the measurements and build a new mobile base with build in switches and outlets. I attached some photos of the saw the way I got it and what it looked like after restoration. I'll take a few more after I build the new table.
-
Well it really helps to go over everything at least twice to make sure you've got it all together right. I had a few loose bolts holding the saw to the table, 2 of the motor to table bolts were loose and . . . the link belt was on backwards !!! I tightened all the bolts, switched the belt and added a little oil to the bottom crankcase and a few drops to the top plunger and TA DA, a nice smooth running saw. Still haven't tried the other speed controller but at least I know that the vibration issue is resolved. It still vibrates a little but that's to be expected when that much cast iron move around. It's running at full speed, which, if my pulley calculator is correct, is around 1,250 strokes per minute. I was able to cut some curves on a piece of 3/4 plywood pretty easily but I'm going to have to figure out how to connect some tubing to that port at the top of the saw that blows air out to clear the sawdust from where the lines are on the piece. I put some rubber tubing in and it works but I need to go get some copper tubing or something that I can bend to point and stay where I need it. I'm going to take a look at some posts on here to see if there are any tips on creating those patterns. The grandson who loves trucks also loves Lightening McQueen from Cars. I've found some pictures of McQueen that I'd like to figure out how to get into a pattern that I could cut on the saw. Of course if I do make the McQueen wall hanging thing, I'm going to have to find something to make for his twin sister or else . . .
-
Thanks for all the "welcomes". This sure seem like a great community forum. As an old retired guy I've been going into several woodworking forums and this is, by far, the friendliest. Garry, my Delta Homecraft can take either pinned or non-pinned blades. I have a couple pinned blades but mostly Pegasus non pinned blades. I've been looking at the pattern library and I was thinking about trying one of those wall hanging things (I'm not sure what the correct name for them is) for one of my wife's grandsons. He love trucks and I saw one of a monster truck I think that he'd love. I haven't downloaded any of the patterns yet but I'm assuming that the black areas are to be cut out leaving the other areas to either be stained or painted, or just left bare. I tried the variable speed control I just bought and it's sort of twitchy. The motor doesn't start up until it's almost 60% up on the dial. It does hold the slower speeds pretty well. But I did find another controller as I was sifting through my "tool stuff" so I may try that one and see if I get better control. I do have a smaller pulley for the motor that would cut the speed in half but then I'd have to either get another belt or remount the motor so it can be slid back further to tension the belt. It does vibrate quite a bit had full speed but I think that's due to the wheels that all my tools are mounted on. I'm working in a 16' x 10' garage so everything has to move. I'm going to see if I can get those wheels that are on springs that flip up so that the base ends up flat on the floor when you get it into the place you want it. The motor is currently mounted on a hinged 3/4" plywood base. The hinges are screwed into the table so I can lift the motor up to get the belt off. I'm thinking this adds to the bouncing around quite a bit. I'll redo the top of the table (2 pieces of 3/4" plywood) to allow me to slide the motor forward and backward to accommodate different size pulleys. That may solve 2 issues with one change. This is an old table I've had for a while so once I get the saw set up so it's working properly and not shaking I think I'll build a new one out of nice clean 3/4" ply. Thanks again for all the friendly welcomes and encouragement and ideas. Looking forward to making lots more sawdust. Joe
-
Hi all, I just discovered the forum and thought I'd join and hopefully get some ideas and information. I've got an old Delta Homecraft 40-110 scroll saw that I've restored. It's close to as old as I am (I'm 78) so it doesn't have all the fancy new gadgets on it like a lot of new saws. It's running off a G.E. 1/4 hp motor that turns at 1,425 rpm. According to the manual the cutting speed, depending on the type of wood I'm cutting, should be between 800 and 1,275 strokes per minute. Right now I have a 3.5" pulley on the motor and a 4" one on the saw. According to my pulley computation spread sheet that gives me 1,245 rpm at the saw pulley. Since the saw makes one stroke per revolution that's 1,245 spm. I was thinking about using my variable speed controller in between the power outlet and the motor plug. That would allow me to slow down the saw to pretty much any speed I wanted. Does this sound like a reasonable step or should I just find a 2 step pulley for the saw? For now I was planning on using it to make toys for the grandchildren. Toy trucks etc. But some of those patterns of the big trucks that hang on the wall like pictures look really great and one of the grandsons LOVES trucks. The question is, some of the plans and patterns I see on the site. Would these more intricate patterns be possible with this saw or do I need one of the newer saws to cut these types of patterns? Joe


