


rafairchild2
-
Posts
593 -
Joined
-
Last visited
-
Days Won
27
Content Type
Store
Profiles
How-To & Articles
Scroll Saw Reviews
Clubs & Organizations
Clubs & Organizations International
Pattern Shop
Suppliers
Village University
Help Desk
Forums
Gallery
eBooks
Everything posted by rafairchild2
-
Race Car for my donation to a cancer charity
rafairchild2 replied to rafairchild2's topic in Bragging Rights
Actually, on Saturdays and Sundays, I am in the shop by 6 or 6:30. I am taking 5 days leave right now so I have been going in the shop early. On yard work day, I'll come in, shower, eat and nap. usually after my 30-minute nap, I might put an hour or more back in the shop. I wound up not taking my nap, so I just did 2 more hours, but I need to get my 30 minutes... -
As many of you know my "Poppy's Workshop" makes toys and donates them to organizations, helping children in need. My current big project is 125 toys for a local organization here in Hampton Roads VA, that helps out with kids with cancer. I am a little behind the 8-ball due to my eye injury early this year and then my summer stoppage. I am about 1/2 way there and have until October, so it should not be a problem. I finished another 20 toys this week (photo 1), and now working on another dozen race cars. I am doing 3 or 4 at a time, so this way I am not left with a big pile of unfinished pieces. It also gives me a sense of accomplishment when I get stuff done, rather than a bunch in 'production'. That being said, I am working on a modified Steve Good design, the first 2 cars you see with the walnut sides, are more along the way of the original design (minus the number). I like this, as the interior is 1/2", and the sides 1/8" each. I can shape the head before gluing, and I think it comes out nice. However, that is more cutting, and then gluing up, which almost doubles production time. So I am opting for a single piece of 3/4" wood. It does make shaping the head a little tricky, but I am working on a process, of sanding on my 1x30 sanding belt, for the rough shape, then using a Kutzall bit to shape the head a bit more. It is still abstract, but it works for me. Images: (1) 20 finished from earlier this week, (2 & 3) from single and glued sides, (4) On the scroll saw, #9 FD UR, (5) Rough cut, (6) This is how I set axle length quickly with a spacer (7) Rough shape, (8) The rough shaped blanks Next will be the rotary tool to shape the head to the finished shape, then on to the barrel sander to add curves to the body of the car, then mop sand, and then the wheels. I will be doing this after my lunch and nap, so this is the start.


- 17 replies
-
- 13
-

-
Very nice! I skipped Halloween and went right to Christmas!
-
Pretty much after EVERY session, I wipe down, do a quick PM if needed, oil if needed (usually my oily rag), and put tools back in their proper place. I use a comprehensive dust handling system so generally, I do not get a buildup of dust. There are times I am doing a lot of toys or some intricate pieces, and I let things fall to the wayside for a couple of sessions. Come Saturday or Sunday, I'll make sure everything is put away and I will take my gas blower and just give the place a thorough puff of air. I might use my compressor and get some of the smaller areas, it all goes out the large garage door. I think it was on one of the FB groups, lord I hope it was not here, I mentioned that I clean after each session, and some a-hole came back with some rude comments and said he would rather cut more than waste time cleaning. I was always taught to keep tools cleaned, oiled, and stored in their proper place. My tools last a long time. To me, it's all about respecting the tools and your workspace. This was hammered into me by my father and shop teachers in school.
-
Started with a WEN 16", quickly installed the pinless adapter. But within 3 months I sold it ($10 loss), and bought an Excalibur 21" added the Pegas Chuck. After a year things went wonky with it and I could not cut a straight line, no way i was tracking my pattern line. You might remember the thread on troubleshooting it. I think I finally got it settled down, but during that time I decided to go for the Pegas 30" and have been using it since. Like my other two saws, I added a 3/4" Loc-Line top vac. I have a removable magnetic sheet when I am doing small parts. I turn off the bottom vac through the blast gate and add a screen inset to my top vac. This way small pieces do not get sucked away with the dust. First photo: Here's the 30" before getting everything trimmed up and moved into place replacing the Excalibur in the background. Second photo, my current setup. The excal is now a back up saw. I may set it back up and keep a thick blade on it for thick cuts. And cutting wood to rough size.


-
Still need to tweak how I will string the lights, but this is pretty much what it looks like completed. Thanks for following this thread. Overall I am very pleased with this piece. I think next year, I'll stack cut these out of Mahonany or Canarywood.

-
So here's what happens when you apply raw linseed oil. I love how the walnut comes alive! That rich chocolate brown! Look above at the photo when clamped to see the comparison. Just after this photo, I took a folder paper towel and worked it between the layers to remove excess oil. Otherwise, I hand wipe with old cloth towels. I am going to let it sit for an hour, and wipe it down again, let gravity do its job. Now I will let it cure for a week, a quick 3000 grit on the facing surfaces and a silicone tack cloth wipe, then the lights go on it. PS: my 30-inch Pegas saw in the background!

-
I would like to add a personal opinion here. And yeah, this is probably snobby... I think once this is finished with the linseed and the natural walnut color/grain comes out, you can see why I am so against using softwoods like pine, or even worse plywood. It never ceases to amaze me that people will cut intricate designs that take hours and hours, days and days, but cheap out on the wood. The finished design is beautiful, but the wood used cheapens it in my eyes. Insert the snob comments here. Flame proof undies are on. Yeah, I am kicking myself for not stack-cutting this, but I fought the urge since it was my first time creating this. Next year I will probably do a double or triple 1/4" Mahogany run.
-
I took elements of some outlines from Pinterest and then added some of my own elements, like the snowman. Not sure if it is Kosher to share though. I also made a lot of penciling changes to the design as I was cutting to make stronger branch connections.
-
More progress at 5 AM today... Dry fit and test the lights, then glue up. I am using the black/orange clamps to not only raise the base up, so the blue Erwin clamps can apply vertical pressure, but since the orange clamps... clamp hard, I am using them as guides for the mating of the pieces. The blue clamps are my downward pressure to the base. I took some cast-off wood, and I am using that to apply pressure across the whole scene to the base. I also used my wide belt sander to make sure the pieces created an even and level surface for mating to the base. After the glue drying, there will be one final touchup of hand sanding and dust cloth, then raw linseed oil finish. Let it cure, then the lights get placed back in. I already lasered my logo on the bottom.


-
I have been working on this over the last 3 days. I have about 6 cutting hours into it, I go slow. Cut from 1/4" walnut. First photo: I am just holding it together with the 1/4" spacers between the layers. Third photo: I have it all clamped up right now after gluing. Tomorrow I cut and shape the base, and glue that up before dropping it into linseed oil to bring out the chocolate hue. Second Photo: You can see that the trees are very fine and detailed, thankfully nothing broke. I still have all my fingers too! As I was working on the piece I closed some of the branches so there was better support, made a lot of changes to the design on the fly. I used #1 and #3 Flying Dutchman Ultra Reverse Blades. The plan is to add a string of multi-colored micro LED 'fairy' lights between the layers. I enjoy making these layered pieces. When I get it together and lit, I'll post that, and then another after the final linseed finish.


- 19 replies
-
- 16
-

-
-
There were a few Christmas pieces I did last year. Are you talking about German candle arch? That is Volker Arnold. You can get his designs from his US distributor: woodyoubelieveshop.com/ The others are NW950 Large Nativity tree pattern and NW4224 Layered Village Scene pattern by Sue Mey. You can get them on her website or SueScrollsawartist Etsy store.
-
No.. 1/4 was on the bottom. I tried everything. FD UR #1, 3, & 5's. Also Pegas 3 &5. Also the 1/4 was a different species, so that caused issues as it was a different grain structure. Lesson learned.
-
Thanks, Jerry. It was more so during the time I was doing the triple stack. 1/4, 1/2, 1/2. I got stubborn for a while and refused to strip it apart. When I finally let go of my ego, things went much better. Still, it wore me down by that point so even though I was having no issues on the single, I was just already stretched to the limit. It was a lesson in just cutting your losses when you see things are not going to work. Do not prolong the agony for the sake of saving some wood.
-
I finally finished my Sue May design, the Ressurection Cross. Cut from mahogany. I first started this as a triple stack. However, reality hit me hard, and quickly. The intricacy and precision required did no favors in the triple stack and it became a source of immense frustration. Blades broke frequently, (I never break blades) accuracy issues arose with the blade drifting off the liines, and the whole process felt more like a battle than a joyful craft. My ego and self-confidence took a hit. It became clear that I needed to step back and reassess. Continuing down this path would only lead to more frustration and potentially compromised quality. So, I made the difficult decision to set aside the original multi-wood concept. The project was reimagined, simplified, and refocused. Two layers were then taken off. And I had most of the bottom done, so a lot of wasted wood. I might try and lay a stencil over those cast-offs, but that might be near impossible. Right now I do not want to see this design ever again! Soaked in raw linseed oil for the finish.

- 10 replies
-
- 11
-
-
Here's the finished product after being dipped in raw linseed oil and hand-wiped. The red in the bloodwood pops now.

-
The tray is an accessory item from US General (Buy at Harbor Freight), just like the drink cup holder you see in 2nd photo above, it is magnetized. I also have the paper towel holder too. They are reasonably priced.
-
Actually, it is only 1/2". If it was 3/4, I would have only gotten 15 minutes on a blade! It's the heat/friction that makes the blade wear faster. You can see the discoloration as it heats and turns blueish. I think it loses it tempering with all that heat, thus the tracking of the blade goes wonky, then you have to push harder. Nothing yet on the wood other than a tack cloth wipe. I will finish with a raw linseed oil dip. Yes, that thin insulation really does help as the sun beats on that door from 11 AM to sunset. Probably helps another 10-15+ degrees.
-
It's a 3/4-inch lock line from Amazon. (2 sets) Connected via a sleeve with a wooden insert RTV'd into place. I used two blast gates, one for the bottom vac, and one for the top so I could throttle the suction to the way I like. As you can see because of the flex hosing behind, raising and lowering the arm does not affect the top vac at all. It will go back into the proper position. Here's what it looks like from the side. This is just before trimming everything up and replacing the Excalibur in the background. And you can see I built the same top vac on the Excal too! 2nd photo shows it in place. 30" Pegas.


-
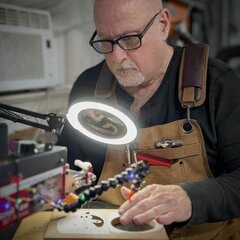
I have not been in the workshop for a month, it's just been too darn hot (95+ with 105+ heat index for weeks)and my little window a/c could not shed the heat. Even on days that the temps dropped a little I just could not find the motivation. Well, we are finally in the 80s, and I forced myself to work in the shop, 30 minutes at a time, getting back to an hour, then 90 minutes. It's a forcing function. But the heat this summer broke me mentally. Here is a tree of life (no roots though) that is a little nontraditional, but I think it came out pretty nice. 100% inside cuts, even the perimeter. I used Bloodwood, which is hard as heck and I went through blades about every 20-30 minutes. Used Flying Dutchman Ultra Reverse. #5 for the smaller details on the right, #7 for the larger on the left, and #9 for the perimeter. Cut on a 30" Pegas, with Pegas chuck. Here are a few images. The finished piece, a closeup through my lighted magnifying glass, and the pan under the saw, I throw the waste wood and dead blades. It is magnetized, so I do keep blades that have a little life left stuck to the back.


- 8 replies
-
- 10
-
-
Sorry, Jerry. I regret posting my NATO display and causing this $t storm. I will hold my tongue. My flag arrangement/application is correct, according to the Flag Protocol AND the Rules of Flags in an International Military Alliance known as NATO. Anything else mentioned by others is ignorance.
-
The flag protocol (of US flag higher) does not apply in this application. The flags in the plaza and inside NATO HQ are all national flags. Additionally, there is the main NATO flag (considered a national flag) and our Warfare Development Command Flag (my NATO HQ in Norfolk VA is called ACT, considered the same as a state flag). So at both NATO HQs. All flags fly at equal height. The ACT flag is considered similar to a state flag, which the flag code says it can fly at equal height. The only time a national flag is moved to the center of attention is during a "National Day". For example, another US flag was raised for the July 4th national day, and it was raised next to the NATO and ACT flags. After the ceremony, it was brought down. Next, my flag display is for my office at NATO HQ, again a different set of rules for Alliance display vs the US flag code. So yes, all are held at equal height, but I am allowed to put my national flag at the center of attention not higher. The 'state' flag (ACT) has to be to the right of the US flag. Remember we are not only a military alliance but a political one made up of 32 nations and subordinate commands. If you look at the flags at the NATO HQ in Europe, you will see the same thing. All equal height. Also, the NATO flag and the Command (HQ) flags are usually the flags at the center of focus. Here's a tidbit most people do not know. The Supreme Allied Commander Transformation in Norfolk VA USA is always a French 4-star (SACT). The Supreme Allied Commander Europe in Brussels (SACEUR) is always an American 4-Star. This was done for political and optic purposes. Below is the NATO HQ in Europe. Note the height and note the flags are always displayed in the same order. I think it is Alphabetical by country.

-
Thanks for the shoutout, Jerry. It came out nice. As to your self-sculpture, you seem a bit 'wooden' sitting at the saw. I think when I posted my flags a while back, it was brought up regarding height. My display is an exception to the US flag height rule. I am on staff with NATO, and my display (as are all the flags in our HQ flag plaza/parade grounds) is all on an equal level as a 32-nation military alliance.


-
Suffered eye injury have been in the process of healing.
rafairchild2 replied to rafairchild2's topic in Bragging Rights
Alex Fox on Etsy -
Suffered an eye injury ~3 weeks ago. Debris blew up under my glasses when mulching on my 42" deck tractor mower deck. I have been pretty much blind in my left eye, due to corneal injury over the pupil area. It was like looking through a glass with thick petroleum jelly on it and darkened. The whole eye was bloody red. Quite a bit of pain came alongside that for well over a week. I was prescribed an ointment for my eye 3x/day and steroid drops 2x/day. I had my 3rd follow-up with my eye Doc today (went to urgent care when I was injured). My eye has finally superficially healed on the surface (that's good), and also improved 4 steps on the eye test this last week. Pressure also moved in the right direction. She was pleased that I turned the corner as she was concerned last week at the slow healing. Now comes the continued under-the-surface healing so we wait. Scheduled an appointment to be back in a month. No more steroids in the eye, however, the ointment is only 1x/day now... When I got home this morning after the appointment, I tried some scroll sawing I actually could see my lines! FINALLY!!! cut the remaining pieces and rattle can finished my 4-layer Memorial Day pieces, which I could not work on while I was blind. Gun, dog tags, boots, & helmet. When I tried working on it when I was first injured it was a major struggle and had to quit for a few weeks, did an hour on Sunday during my YT live stream, but that was a struggle... now it feels like I am almost back to normal. Not fun being blind in my eye, thankful, it was temporary. Ran out of black paint on one piece so I did not speckle it the way I wanted. Getting more tomorrow.

- 13 replies
-
- 16
-


