


JTTHECLOCKMAN
-
Posts
4,163 -
Joined
-
Last visited
-
Days Won
32
Content Type
Store
Profiles
How-To & Articles
Scroll Saw Reviews
Clubs & Organizations
Clubs & Organizations International
Pattern Shop
Suppliers
Village University
Help Desk
Forums
Gallery
eBooks
Everything posted by JTTHECLOCKMAN
-
How elaborate do you want to get. Rick and Karen had this book out. https://www.thriftbooks.com/w/custom-wooden-music-boxes-for-the-scroll-saw-the-berry-basket-collection-revised-edition_karen-longabaugh/1846937/item/42128919/?mkwid=|dc&pcrid=77584467524595&pkw=&pmt=be&slid=&product=42128919&plc=&pgrid=1241348924126639&ptaid=pla-4581183930092993&utm_source=bing&utm_medium=cpc&utm_campaign=Shopping+-+Low+Vol+Midlist+-+%2410+-+%2450&utm_term=&utm_content=|dc|pcrid|77584467524595|pkw||pmt|be|product|42128919|slid||pgrid|1241348924126639|ptaid|pla-4581183930092993|&msclkid=ea5126d184841d8056384e3838affa9b#idiq=42128919&edition=6527162 Speilman had a book too. Here https://www.rockler.com/music-box-plan?country=US&promo=shopping&sid=V91211&msclkid=e70cf3149519122e7a169bfd293204c3&utm_source=bing&utm_medium=cpc&utm_campaign=OG_BNG_PDSRCH_SHOPPING_NA_ROAS_PMAX_USA_NA_UNDER&utm_term=2333094955059436&utm_content=UnderSpend Again you can get into real large music boxes and they play expensive components. There are large scrollsawn clocks that were designed to play music. They have turntable boxes that have dancing figures on them and play music. Man there are tons of patterns out there. The Berry Basket with Rick and Karen had other books like their Victorian music box collection. They also had a Holiday Scrollsaw music box book. Look for them. They have some extraordinary style patterns. Google is your friend. As I said you can spend as little as $10 for a simple one or $400 for a good quality one with 72 notes or better. All depends what you are looking for.
-
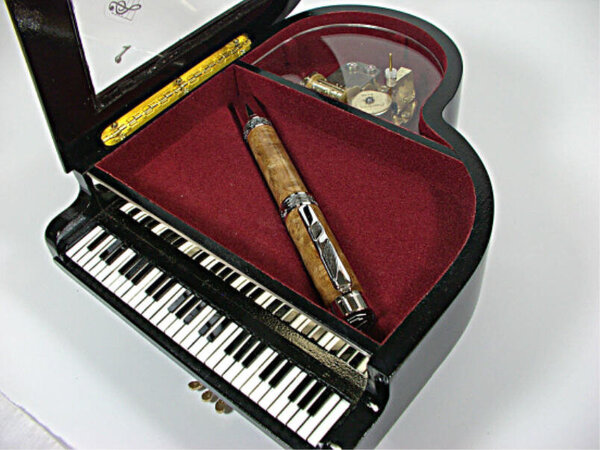
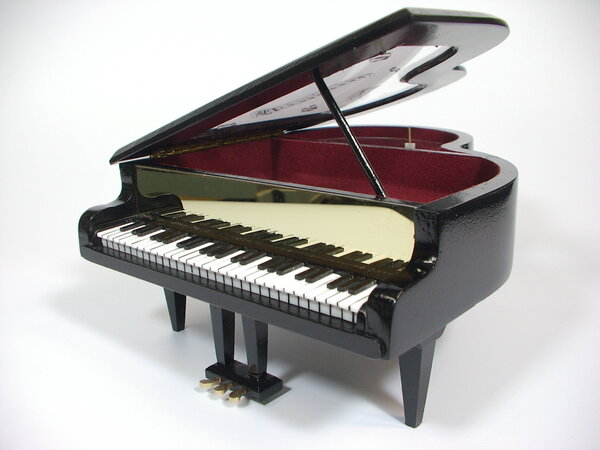
You can get music inserts from many different sources. Amazon is a big one. Woodcraft, Hobby Lobby, walmart, ebay is big too. The more notes the more expensive. https://themusicboxcompany.com/purchase-musical-mechanisms/. I made a few over the years but the last one I made was this one which I made into a pen box. I entered this in a pen turning contest and won this category. I got this melody from an old Elvis statue I picked up at a yard sale many years ago. Took the works out and used it. A far as patterns, the mind is your pattern maker. I am sure there are patterns out there. Check Steve Good or just do a google search.
-
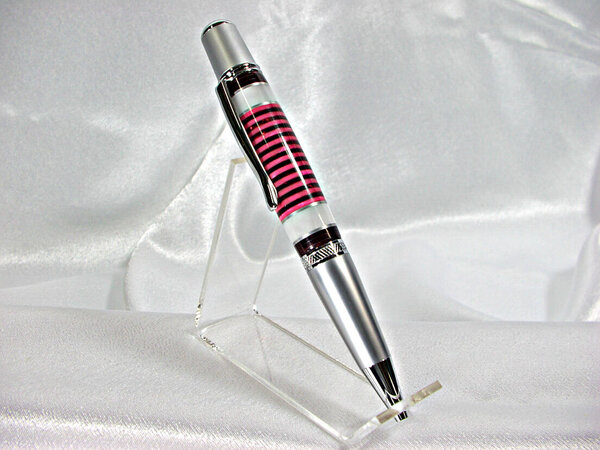
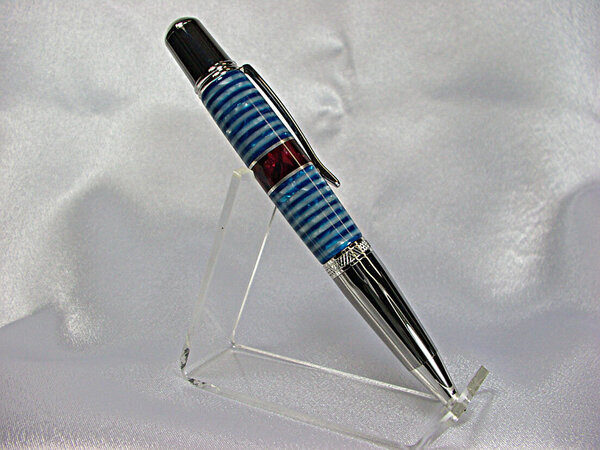
I made a couple pens using guitar pics years ago. The acrylic ones have great color.
-
Absolutely pen making is addictive as well. You can do simple pen making or can step it up and make kitless pens or all kinds of custom pens. Some pen hardware can cost $100 and that is just the components. Now do a fancy blank and that pen can sell for over $1000. It can be lucrative as well. Just like scrollsawing alot depends on how far you want to dive into things and also how far you want to take it. Buying quality equipment plays a roll too just like scrollsawing. Kevin here has taken the leap to get into lasers and follow that path. Same thoughts apply to that hobby. Plenty of hobbys out there to feed the artistic minds.
-
Thank you. I took my scrolling and other woodworking skills and jumped into pen making. Joined a forum like this and learned different skills such as segmenting and casting. Found out there is so much you can do with a small canvas like a pen . But I do try to combine the artforms at times too and that is where making boxes and pen stands come in. Using a lathe combined with other woodworking tools keeps me in the game. I have so many ideas in both areas that at times my mind gets crazy. I love thinking outside the box and being creative. You understand what I am saying because I see the same in you. Example that round box. You took a project you saw and put your touch on it and basically made a whole different project but still has some features of the original. Sharing ideas and methods is what keeps the arts alive. When I pass on just maybe someone will remember one of my projects and try to duplicate it also. I always find that to be the highest form of compliment. Thanks again and hope you did well at your show.
-
Yes. II will be making a couple different themed round boxes like yours. One will be the poker theme with card symbols and another will be a billiards theme with a rack of billiardballs (Rack and balls.) If you could do both patterns that would be great. I make pens and the most sought after themes for me is billiards and poker. Many guys buy the pens so I was looking for other items I could make. Seeing your round box design just flooded my brain with different ideas in these 2 themes. I always look for inspiration. Having been out of my shop for 2 years+ I need to hopefully get back this winter. Need to build some inventory. With those patterns I can enlarge or shrink as much as needed. I wish I had the ability to do patterns. Thank you. Here is one billiard themed pen I made. And a poker pen I made.
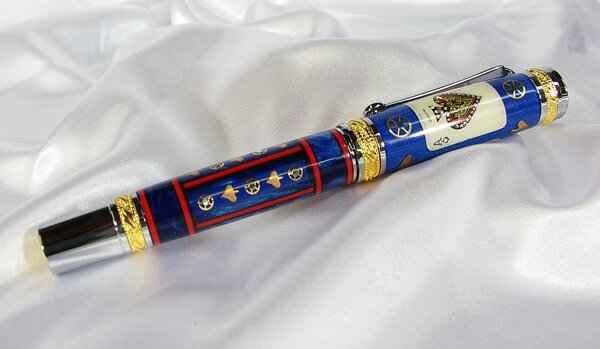
.thumb.jpg.45b8c6ada885b3a3a0a6a4d2a5335ca9.jpg)
.jpg.f92c284dc8c6395b802ca1fe0d447107.jpg)
.jpg.e7d59477b4a1f8b6065bdc031aab81f4.jpg)
.thumb.jpg.2f2fa19cfbd02ad53657a73de358a22d.jpg)
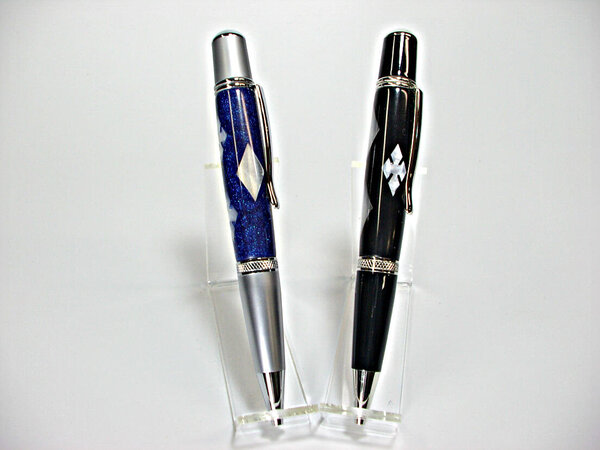
-
Thank you. I will do a search. I just noticed it was here under How To tutorials you can find Dave's video too. That was the one I remember.
-
Dave that is actually a nice size. hard to tell from photo. I believe somewhere at some time you did a video of your technique of inlaying. You may have done a couple and maybe a tutorial also. I thought I had them achieved somewhere but can not find them and being I had to get new computer 3 years ago many things got lost. I was wondering if you would share these links again or point me in the right direction. Thank you. I want to do a box like this with poker theme. Have the 4 suits of cards in the ends. If you could do a pattern for that I would appreciate that. That should be a fairly easy beginners inlay project for me. Every time I see one of your boxes I get this urge to learn the technique. Nice combo of woods too by the way.
-
Dave your work is always so great to look at and once again another beauty. I also love your inlay work. Could you post a few more photos of the side and the back to get a better look of how the pin hinge looks closed. This design opens a whole bunch of ideas. I may have to give a try at some time. Been away from the scrollsaw for quite awhile now. This gives me inspiration. Thanks for showing. One other question. After looking at the precision, did you build the blank with stacked layers and then use a forstner bit to drill down the center and then cut in half.? What are the dimensions of the box? That is impressive. A+++ Do you have a link to Steve Goods page where he shows his?
-

Halloween Gnome - AI generated
JTTHECLOCKMAN replied to don in brooklin on's topic in Bragging Rights
I think the you did a good job with the pattern. Not a fan of the pumpkin face in the hat though. It distracts from the Gnome theme. I may have to play with that program some. Have some ideas. I am guessing it takes some key words to get a good pattern and if you change those key words but still mean same subject matter it would change pattern. -
You are correct with teeth. I forgot what they were. Have them somewhere in the drawer. Just do not use them. As far as difficult that can be corrected by using a magnifier and also I think there is a notch on top.
-
Are you sure you inserted the blade correctly. Easy to get them confused because teeth up and down. The small amount of teeth on the bottom should not be enough to pull the board upwards. My go to FD blade is #5 Penguin silver reverse. They are not as sharp like ultras. I cut everything with them.
-
I use my tablesaw alot. Any time I do some cut that I feel unsafe I make a jig to rectify that. I am comfortable enough around the saw that I do understand the dangers. I have cut hundreds of thousands of these small pieces to make these baskets over the years. Made a jig to do it but every so often one gets hung up and clips the blade just right and gets launched. It penetrated my back sheetrock wall that is about 15 feet behind me, like it was butter. The first time it happened it scared me but I knew it was possible so like you I know not to stand in the danger path. These pieces are not large but can be a dangerous. Good luck and stay safe.
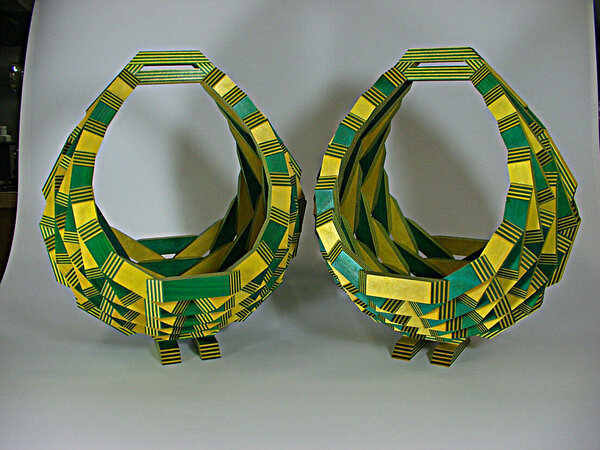
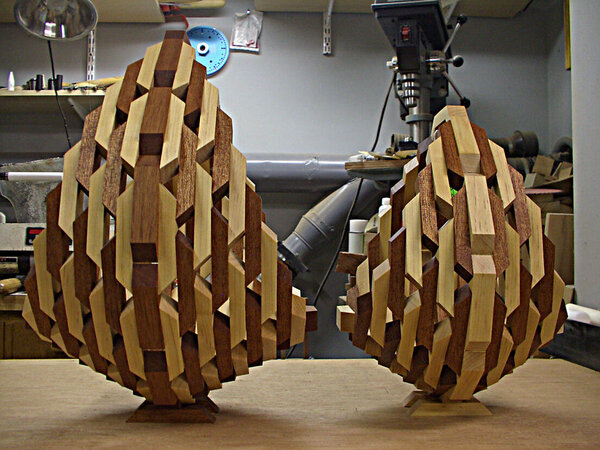
-
The smaller the piece the smaller the tape to hold the piece. A spinning tablesaw blade will rip a small piece so fast you will not see it. If a tablesaw blade has any run out in it it wobbles and that is an extra force side to side thus pull the tape off the board. Kickback is highly likely in that situation. You do as you see fit. Just a suggestion. but I have seen this before. Even doing shapes like that on a bandsaw can be troublesome because when the blade hits the front of the object it wants to force the piece downward and can dislodge the tape. The scrollsaw would be the best choice because you control the speed and thus the force applied to piece. Now I have used your method to cut tiny little piece but they were cut from longer pieces.
-
If you are going to do this why not cut the stock down to thickness before you scroll the pieces. Having a larger piece of wood may help prevent kickback. Such small pieces can be launched quickly.
-
Tip for doing pattern with backer
JTTHECLOCKMAN replied to don in brooklin on's topic in General Scroll Sawing
I do not know. It just makes sense. -
Tip for doing pattern with backer
JTTHECLOCKMAN replied to don in brooklin on's topic in General Scroll Sawing
I have always cut both same time. That is a scrollers tip that has been passed down for many ages. Seen that when I started some 40 years ago and it works well. Always good to repeat some of these type tips. -
Where is the front tension knob? see if anything here helps. Good source of info. https://sheilalandrydesigns.com/free-pattern/tuning-your-excelsior-or-excalibur-scroll-saw/ Or Here https://www.caboolturewoodcrafters.com/Manuals/excalibur scrollsaw _manual.pdf Or here https://scrollsaws.com/SawReviews/excalibar_tune_up.htm
-
I did not say do not paint it. I said why does it have to match. That will not get you $1 more. Paint it black or pick a close colored paint from Home Depot. You can get a custom colored paint mixed from auto repair. Big$$$. Yes you do better if it is painted and not rusty that is obvious. For your reading pleasure. https://www.scrollsawvillage.com/forums/topic/18194-hegner-paint/
-
Why does it have to be same color. Paint it black. Not going to add any value. As long as you have a stand. Label is on stand so cover that. Or just get a bunch of red cans or orange, whatever that color is, of paint and have at it.. Dewalt stand is black.
-
He said he fixed it. Was control board problem. How he fixed he did not say.
-
I think it is best to leave this here and move on. Glad you found a solution to your problem. I and am sure others wish you alot of luck in your other adventures. Many of us here are scrollers for many years and have used used this platform to educate ourselves as well as help others when called upon. We all have other careers and many times they come into play while answering other questions. many times a topic goes astray abit but this is normal for all web sites including FB. When we come here we choose to participate or just lay out for many reasons. Sometimes and again this happens in all forums but the written word gets misinterpreted which is normal. We all do not talk the same way and that is a good thing. But there is no ill intent here. Sometimes it takes some time to get into the feel of a site. Knowing the players is part of it. Always nice to know a little background on people here. But also remember we pay to play here too. Not like FB. So again very happy with your fix and always like to hear this. And whatever you do to help others on your other ventures. Always feels good to repay others with knowledge you gained in some fashion through others.
-
Put it on rubber feet and will do the same thing. Foam is doing nothing. Just suggestions.
-
Easy does it. That one line statement is very limited with info. A saw can have various problems that mimic each other. Being an electrician I seen this many times in the field. Can not pinpoint things with such little info. Glad you fixed it but it is nice to reply and tell us that you did.
-
I guess no follow up. Maybe scared him off.


.jpg.dad54c83fbe27af77181c63f1187860b.jpg)
.jpg.f92c284dc8c6395b802ca1fe0d447107.jpg)
.jpg.e7d59477b4a1f8b6065bdc031aab81f4.jpg)
.jpg.a6b17f22215e715086b04f70df7b5d46.jpg)


