
.gif.3b913229ce2c6305bb30dba58a8387b0.gif)

kmmcrafts
-
Posts
9,642 -
Joined
-
Last visited
-
Days Won
142
Content Type
Store
Profiles
How-To & Articles
Scroll Saw Reviews
Clubs & Organizations
Clubs & Organizations International
Pattern Shop
Suppliers
Village University
Help Desk
Forums
Gallery
eBooks
Everything posted by kmmcrafts
-

Another new Scroll saw, to me.
kmmcrafts replied to Hudson River Rick's topic in General Scroll Sawing
Parts likely cost more than just replacing the saw with another one as cheap as they're selling it. -
Attempted Repair of Shipping Damaged Excalibur 21
kmmcrafts replied to KellisRJ's topic in General Scroll Sawing
I've never contacted the manufacture myself but through messages on here and helping others get their saws fixed they were able to get parts they needed through a phone number in their manual.. Sounded like the company was very helpful to get them the parts they needed etc.. but that may be based on "who" you get on the phone because I also have read that they were basically useless, so take that with a grain of salt, LOL That's good to know they put the thread locker on the new parts.. When mine started acting up I wasn't going to pay for new parts when the old block / rod was fine. I just chased the threads to clean them up on the block and rod then put the thread locker on and reassembled it.. haven't had any issues since and that was several years ago now. They need to get those types of shop classes back into schools. I was able to only need a couple "required classes" in high school so through my high school years I had to have shop classes to fill out my school day. We had machine shop, welding, wood shop, architectural drawing, auto shop, fiberglass and plastics. I'm probably forgetting some but I had to take them all plus a sewing and cooking class just to fill my day out, LOL. Some of these classes I never do that stuff now but the skillset is used a lot just knowing how things are made or a understanding of how things work.. Now days the machine shop would be CNC and there is a lot of lost knowledge because the CNC calculates a lot of stuff for you.. still a skill to run them but not the same skills.. same for the drawing class.. it's all done on computer now. Though the kids need to "want to" take those type of classes too.. because if they have no interest they won't learn it as well either.. for instance I also had typing class but I hated that class and to this day I just hunt and peck the keyboard.. kind of a skill I wish I had taken more seriously as it would have been helpful now days, Nice shop set-up you have.. I'd love to have some machines like that.. I'd probably need retrained as I haven't touched a old metal lathe since high school and coming up on 40 years since I graduated.. -
Attempted Repair of Shipping Damaged Excalibur 21
kmmcrafts replied to KellisRJ's topic in General Scroll Sawing
So that split is supposed to be there if I'm looking at what area I'm thinking I'm looking at, which is just under the upper arm at the back of the saw table between the upper and lower arm at the back ( base ) of the saw. I see where it looks like it was bent in too far near the bottom of your photo.. I think you're on the right track as to bending it back out etc.. As for the tension rod, you are basically correct that it's just a threaded rod. IF I had to guess the square block down inside the saw where that threaded rod goes into is going to need replaced too and I might suggest you add a little blue loc-tite on it since these are pretty common to have the threads get loose tolerances and they'll start adjusting the saws upper arm each time you raise and lower that arm it'll move a little... unless you put a little thread locker on it while you have it apart might save you a headache down the road in a year or so. IF you end up replacing any of the saws frame portion of the saw I also suggest getting the parts from the Chinese manufacturer rather than Seyco because the tubing and frame have different size specs.. Most all the guts of the saws are the same thing but the main frame tubing etc. is different.. Anyway, I think you're on the right track to getting the saw repaired.. Hopefully you'll be able to save it, they are nice saws once they are tuned and running good. Yeah the China made one may give some folks a hard time but you seem really mechanical inclined and not afraid to tackle a repair.. -
Attempted Repair of Shipping Damaged Excalibur 21
kmmcrafts replied to KellisRJ's topic in General Scroll Sawing
Ray beat me to it.. I would check that arm tension adjustment.. this may not be damaged at all because my saw was the same way when I got it and I had to adjust the set screw deal like Ray said. On that back side ( inside the saw) of that set screw is a spring loaded ball bearing that keeps tension on the side of the arm to basically hold the arm up in the air while you change a blade etc. As for the tension rod, I'm not sure where you're saying there is a stress crack. If you can post a photo that would be helpful to understand what part is cracked. -
I hadn't thought about making a box the size I need the tabs to be and then cutting and erase the old.. It would be a slow way of doing it but it could work. The lightburn program is what I run my lasers with which is also a drawing software. Love it and it's much easier to work with than inkscape.. Same goes for my Vcarve program for the CNC router.. It's just trying to learn 2-3 different programs all at or near the same time.. and figuring out what dose what. LOL For your info or anyone else following this... there is a free website program to create boxes with or without tabs etc.. you put in the sizes and material size etc.. then it'll create a box for you to download. Check out the link below.. https://www.makercase.com/
-
Being I've been working with lasers instead of the scroll saw this year I've been following more laser message boards. I run across this topic the other day on one of those message boards about this double sided tape for projects that have a backer... I've not bought any and have no experience with this stuff but thought it was interesting and it may work well for those scroll saw projects too. On the laser site they say they attach the tape to the back side of the front piece and cut it out then they just sort of peel and stick to the backer board. I don't know how forgiving this stuff is as far as if you don't get it lined up correctly if you can remove it and reapply or what so if you try it or have used it before then let us know. I know most of the use for this in the laser community is for small ornaments and such and I also know many of those folks make a jig to do their gluing so they get it lined up every time so maybe it's pretty sticky and that is why they use a jig? Also they mention they like the 6" wide as the 12" gets a little tricky to apply evenly.. also some mentioned they just place 1" strips rather than covering the whole thing.. Just thought I'd share this info as I haven't seen any mention of it in the scroll sawing community.. If you have used it or give it a try let us know how it goes.. Might be a issue with scrolling as spinning the project on the saw table may wear off the peel and end up sticking to the saw table? That would be my only concern for this use. https://www.amazon.com/467MP-Clear-Adhesive-Transfer-length/dp/B007Y7CV86/ref=pd_ci_mcx_mh_mcx_views_0_title?pd_rd_w=9QnFb&content-id=amzn1.sym.aa60a3ed-f4d0-4018-a489-7522a864e399%3Aamzn1.symc.40e6a10e-cbc4-4fa5-81e3-4435ff64d03b&pf_rd_p=aa60a3ed-f4d0-4018-a489-7522a864e399&pf_rd_r=KTQ71KTDKPRPPED8QJWV&pd_rd_wg=GIQYy&pd_rd_r=fdddbf01-640e-49c5-9adf-f9b8798463be&pd_rd_i=B007Y7CV86&th=1
-
As you say... the dust might be the least of your worries with using these due to mold and bacteria. I got pretty sick once with something respiratory.. doctors had no clue but put me on antibiotics and cleared it up.. next week working in the shop I got it again.. I think there was something in my filters of my dust mask.. Ever since then I started changing my filters more often than not.. they're cheaper than a doctors visit and not being sick is always a big plus... I'm not sure I'd even bother trying to "clean" to prolong the life of something like this.. as I said.. filters are cheaper than the office visit so I would just change the filters or replace the mask.. your health is worth it.. Probably safer to not even wear a mask if you're not going to change out the filters and breath clean air what's the point.
-
I didn't know they made that many different ones. I've always liked the titebond glues and was really happy to find the translucent one which is my most used one for gluing clocks to the bases and backers on ornaments etc.. as it dries clear. I use the titebond 3 for cutting boards or other glueups etc.. Now that I'm using a laser the folks on the laser groups say to use a double sided tape.. I forgot the 3M number but it's basically a very wide double sided tape and then they laser cut the face side of the ornaments.. peel and stick it to the backer part of the ornament.. no messy glue or worries of squeeze out etc.. I might look into that.. might could work for scrolling so I'll make a different topic about this with the number of the tape they use.
-
Thanks Bill, My wife uses this all the time.. She is always steeling my packing tape and my side cutters so now her tacky glue is going to end up out in the shop.. Lets see how she handles the disappearing glue.. Karma about to go down,
-
Okay after reviewing the comments and after making a couple more of these I have figured out a method that works well to assemble it using the TiteBond glue that I've always used. I do wish it set up quicker so I think I might try the Quick and Thick glue mentioned above.. IF I were scroll sawing these it'd be easy to make without having the joints but until I get better with the software to redesign this for the laser I'll be making it as is.. this isn't like changing up plans on the fly with a scroll saw.. laser is going to do what the design is on the computer. I have figured out how to adjust the joints on some of these projects to make them a tighter/ looser fit but this particular design I can't seem to figure that out with this one. LOL.. some of the designs the designer made it for the type / size plywood they have / use.. and some of it is oddball sizes from other parts of the world so learning to adjust this stuff as I go.. or at least trying too.. LOL
-
I've been working on some lanterns for Halloween and the design has I guess you'd call finger joints.. some designs the joints are tight enough they are "friction fit" and no need for glue while others need glue to hold them together. Once I get better with the laser software I'll learn how to change those finger joint sizes to make them friction fit.. It really boils down to the exact thickness of the wood you're using and not all the same thickness from one sheet of ply to the next due to moisture content etc.. I always glue the friction fit ones anyway but they at least fit together and stay unlike some that you need 5 hands and 20 fingers to hold everything... this brings me to the quick drying glue question.. I've heard / seen the term CA Glue..I know nothing about most any glues other than the Titebond 3 and translucent ones I've been using for years. I've been using cheap dollar store super glue but each project takes close to a whole tube and would like to find a bigger better source for a quick drying glue.. Super glue seems to be holding to the wood decent enough but not sure how it will be longer term.. This is why I make this topic... what would be a good quick drying glue that isn't going to break the bank.. I did a little research last night and it looks like some CA glues require a activator? Maybe I just want to use a larger bottle of super glue.. just thought I'd ask some of the more experienced what might be my best options. Also helpful to come with a smaller tipped to get the glue into tight spots.. the little screw on tips on the super glue I've been using work pretty well, could be a tad longer but doable the way they are but that is also something I'm looking at for whatever glue I end up using. I'll load a photo of the lantern I just made shortly as it's on my phone and not on my computer that I'm currently using. LOL
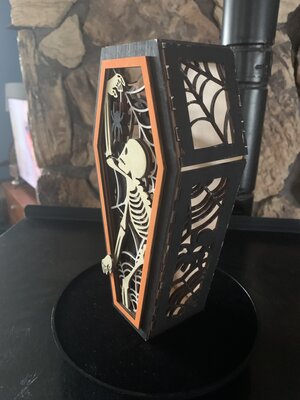
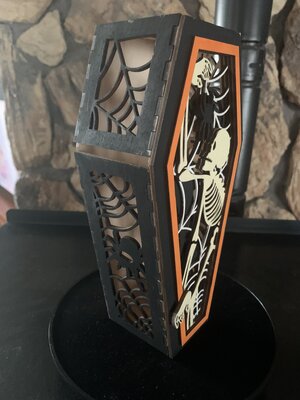
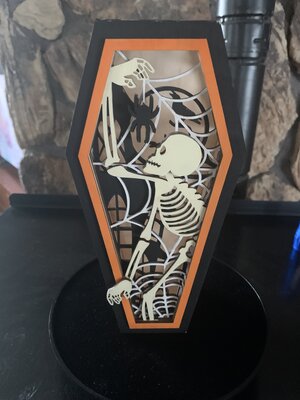
-
Nice and simple design.. With the technology we have these days you'd think they could come up with a better method for many things like this. You can get frozen chicken in a ziplock style resealable bag but cereal and chips you need to buy clips to seal them back up, and what's up with mayo jars being taller than a butter knife so you get mayo all over the knife handle and your hands etc. when the jar is getting low.. same with peanut butter and many other jars. Some of the ketchup bottles have a seal top that you need to run a car on it to get it to squeeze out then when it does finally come out you get a half bottles worth of it all at once. Edit: The engineers who designed these things clearly never prepared their own food otherwise they'd make it more user friendly. LOL.. Guessing they must not brush their teeth either..
-
Welcome to the village!! What happen to the hose? I know these have the line-loc hose here in the USA.. when they get older the plastic gets brittle and crack / break. However you can take these apart and just remove the broken one or two pieces and place it back together.They come apart kinda hard and go back together kinda hard too. Soaking the hose in hot water or heat with a heat gun carefully to sort of help expand it enough to help press it on.. adding some soap / water or something will help the pieces slide together too.
-
Hmm, kinda like the solid back idea and the magnets... I did think about cutting the solid back on a angle so the back could slide in like a slot.. sort of like some of the small box tops Steve Good designed many years ago.. The hinged part as designed is what I also felt to be a weak point.. though those scents that my wife and daughter use last quite a long time, like I think about 6 months or more, so I wouldn't think they'd be opening it a lot but.. also have to consider the heat in the car possibly drying out the wood more or? Not sure how that might affect things too. Just experimenting really but I do think the solid back piece is probably much better way to go. Thank you for the magnet idea I might mess around more with that idea. Also the dowel idea might be considered and experimented with as well.. But thinking that magnet idea might work well for the visor clip too..
-
Didn’t know you could buy such a thing but this gives me some ideas. Still not sure if there would be enough room around the outside edge to put a screw that would hold the weight etc. But, maybe an option if they want to choose a clip or hang string. If they choose a clip I might could use some sort of fasteners in the hole where the string would go.
-
I did think of those frame holder tabs, I’m just not sure about putting a screw in the edge of the wood as there isn’t much wood thickness around that outer edge ( between the edge of the door and the outside edge is maybe 1/8 inch at most. ). That is why I was thinking maybe just making a solid removable door rather than the wood slot hinge type door but that is what makes it unique in my opinion too. Plus it’s kinda like a vent to let the scent out.
-
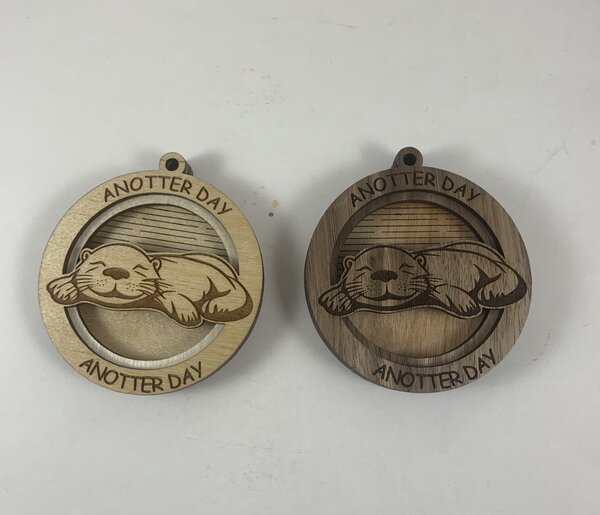
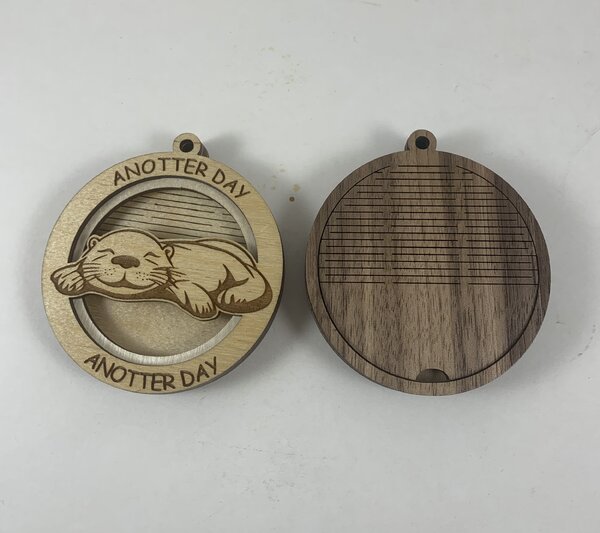
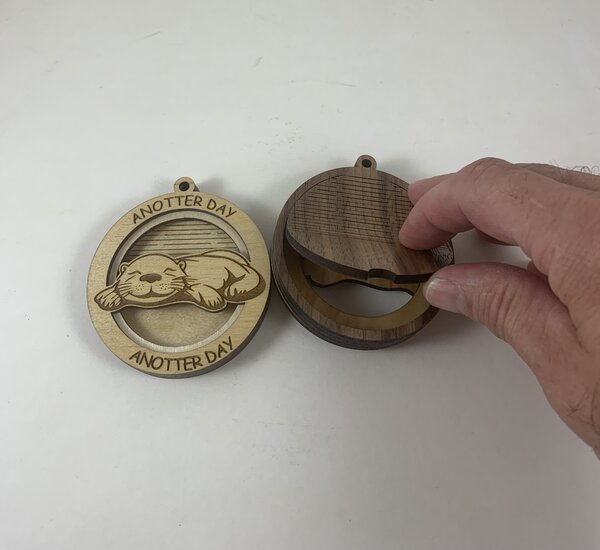
I made these car air freshener holders the other day and the original pattern calls for a piece glued to the back just in the right spot to put a slight drag on the door so it doesn't just flop open.. I don't like the little 1/8" thick piece sticking out the back.. while the piece is tiny piece it's thick and bulky looking so I didn't glue it on but the door will just open and let the scent pod fall out. Not a lot of wood area around the edge to work with.. I may just have to get a piece of 1/16 ply and make the small part with that to make it not look so bulky. Thought maybe a small metal tab too but not sure how I would attach it.. Also looking for a idea of how I might be able to make something to use as a clip in case someone wanted to clip it to the sun visor rather than hang it.. but since you have to open it on the back to place a refill in I can't really attach a clip of sorts on the back.. Maybe I need to redesign the back to not have that goofy hinged door and just make a solid door that has a clip of sorts on it and can remove the whole back to change out the scent packet? Also I modified the design so there is 4 layers rather than 3 because I wanted to custom size it to hold the scent pods that are available at bath and body works stores and original design had too big a hole as it was designed to put felt in it and put essential oils on the felt and since my daughter and wife like to use those bath & body works things I made it work for those. The original pattern made the piece almost 4" in diameter and I sized it down to about 2.25 - 2.5 ish inch and added that 4th piece for clearance for the scent pod. Shrinking the size down also made for a small spot for the finger grab cutout to pull it open.. I can easily change the size of it though in the future ones I may or may not make, LOL Anyway just looking for some ideas to improve it from its original form and make it more user friendly so open to other suggestions too.
-
Welcome to the village! Try this guy.. I would send a message first to be sure he is still selling these retrofit holders.. He's been doing this for a lot of years and you just don't see mention of him much anymore. https://pozsgaidesigns.com/page0006.htm
-
I don't prime wood products typically unless there is a drastic color change in the woods grain or a imperfection that needs some "fill and sand" type primer to smooth the imperfection out or I use primer to get a super smooth surface. I used to use a shellac or sometimes a clear to help in not having to use so much paint as the first coat usually just soaks into the wood.. however for the most part.. the shellac or clear is just as expensive as any of the main colors so unless I'm really low on the prefered color I just use the paint.. because it's not costing any more or less in most cases. Most people aren't using pearl type auto paints on wood but if you were to use these the primer would be a must for color consistency. There may be some craft paints like this too but I think the majority of them cover well enough without having to use a primer.
-
A lot of CNC router and Laser guys make things out of plastics.. there are many colors to choose from etc. Don't know how well they might work with scroll sawing.. I just bought my first sheet of clear acrylic yesterday to try with my laser... now to figure out what I want to make with it will be another 2-3 years probably, LOL.. Been wanting to pick up a sheet to try for about 2-3 years so I guess I'm giving myself about the same amount of time to actually make something with it, https://www.jpplus.com/rowmark-mattes-engraving-plastic?sku=222402-QTR&utm_source=google&utm_medium=cpc&utm_campaign=NX_pmax_high_value_exp_feb_2025_control&gad_source=1&gad_campaignid=17672719614&gbraid=0AAAAADz94a9yIN4BUek5kXNDD8koGM_4-&gclid=CjwKCAjwg7PDBhBxEiwAf1CVu8rKXyWk-Rc6jgKOWaPOHe-CznET9LAKAhXKsxj1a2wvGwbyKbeC8hoC3_sQAvD_BwE
-
Hmm, that's interesting... I might have to look into this one. Looking like I won't be lasering this for sure.. they bought another mirror but it's the larger than the original one.. I think they're planning to buy vinyl stickers so they can take them back off and use the mirror in their home once they're done with it for the wedding purpose.
-
Thank you !! I think I'll get this font for future use.. I may not be doing this mirror now.. I just realized tonight after trying to fit the mirror in my laser that it's not going to fit.. Maybe they'll purchase a slightly smaller mirror and still have me do this but the current mirror they gave me to engrave is about 1 -1/2 inch too big to fit in the laser and also have passthrough doors on my laser but also won't fit through either of the passthrough doors, LOL... They did talk about this when they purchased the mirror that if it doesn't fit they'll have to buy some decals to make the text they want.
-
Hot Rods and Motor Bikes - Scroll Saw Challenge
kmmcrafts replied to Travis's topic in General Scroll Sawing
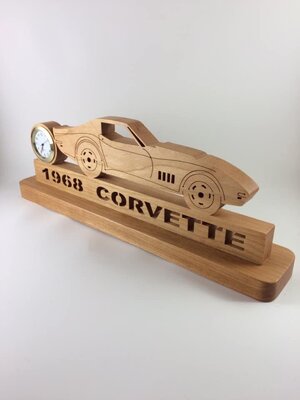
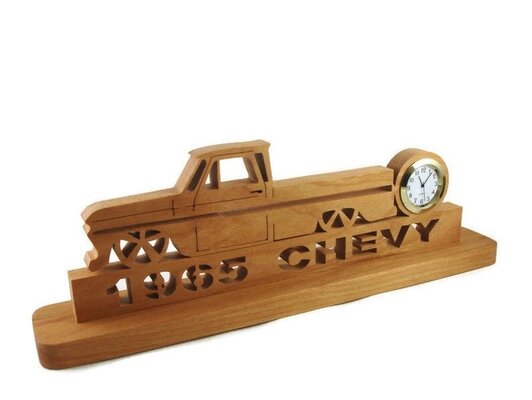
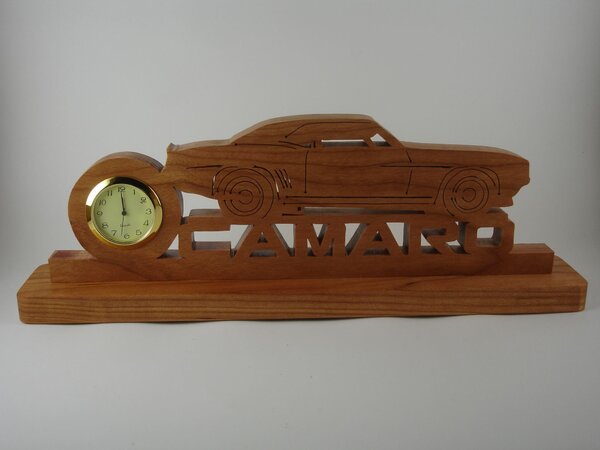
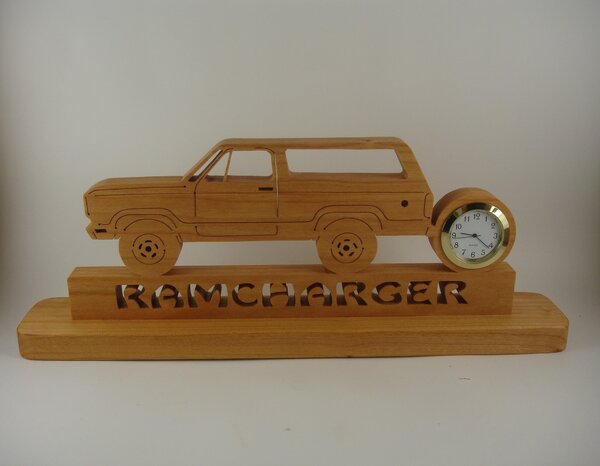
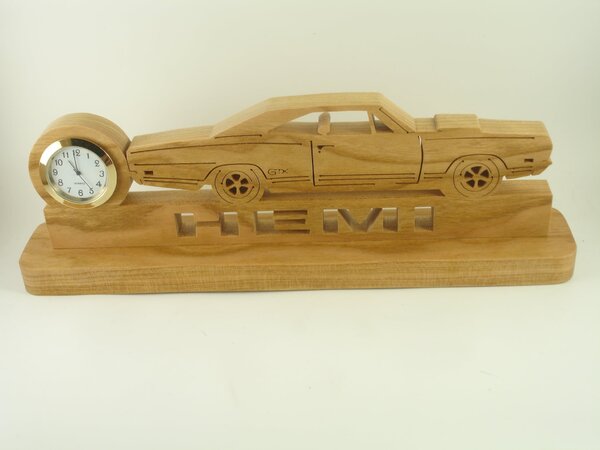
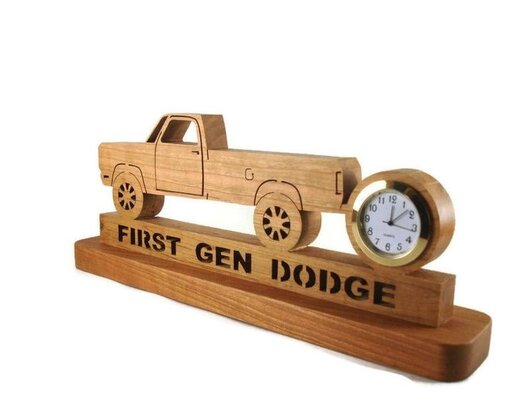
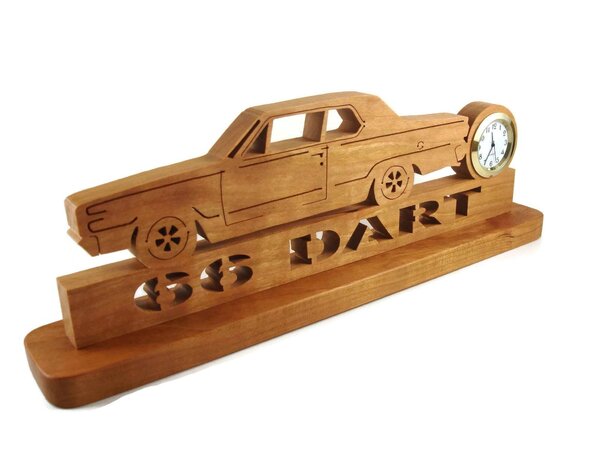
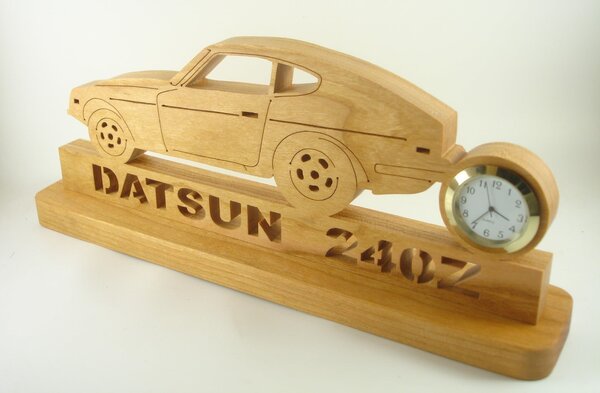
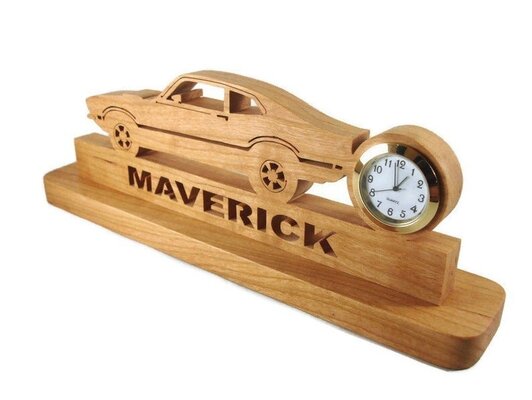
Small portion of the clocks I used to make.. at one time I had over 200 different models / years and stock or hot rod / lowrider etc.. Tried to put them in order by make.. so if you don't like chevy scroll down, LOL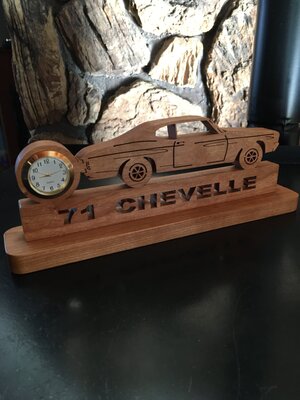





.png.e56ad41cf12a6539412cc0537598810a.thumb.png.3d1abadccd762333b48b640ea3b96ffc.png)




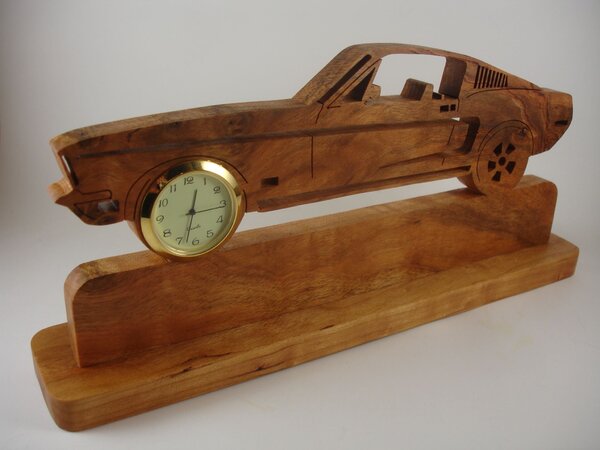
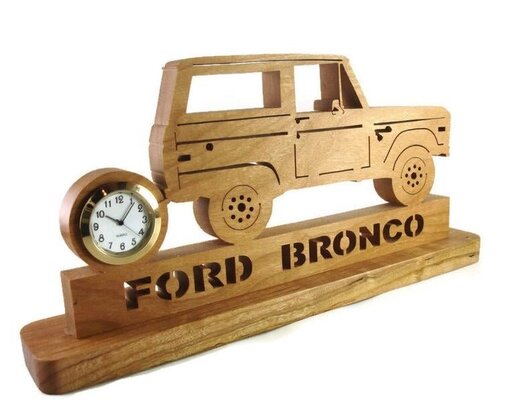
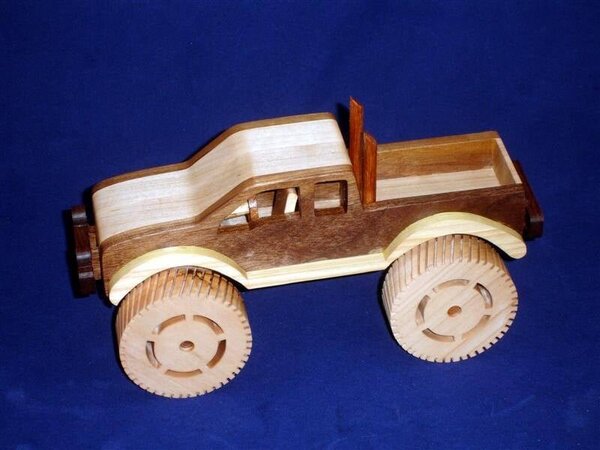
- 25 replies
-
- 10
-

-
- hot rod
- motorcycle
- (and 3 more)
-
Oh boy, sooo many to choose from, LOL.. Thanks for making this harder than it should be.. Guess I just need to do some sort of quarter flip on these and choose one.
-
Thank you Don, I'll look into this and also now remember that Dafont site.. maybe I can find something she'll like.. worst case is I'll have to have her write something and engrave it from her own font, lol


.png.e56ad41cf12a6539412cc0537598810a.png.a04a555fac7d241934fc0595bc2cfb0a.png)


