


Dave Monk
-
Posts
5,585 -
Joined
-
Last visited
-
Days Won
58
Content Type
Store
Profiles
How-To & Articles
Scroll Saw Reviews
Clubs & Organizations
Clubs & Organizations International
Pattern Shop
Suppliers
Village University
Help Desk
Forums
Gallery
eBooks
Everything posted by Dave Monk
-
It came out great.
-
Steve touched the lives of many from all over the world. He will be truly missed. I give him and The village all the credit for contributing to my addiction to scrolling. It would be awesome if someone could reach out to the family and acquire his pattern catalogue to keep his memory alive.
-
I especially like the hinges.
-
I pride myself in being able to coverup imperfections.
-
I cut all of these out separate.
-
They were definitely a challenge. They are a little over a 1/4" tall.
-
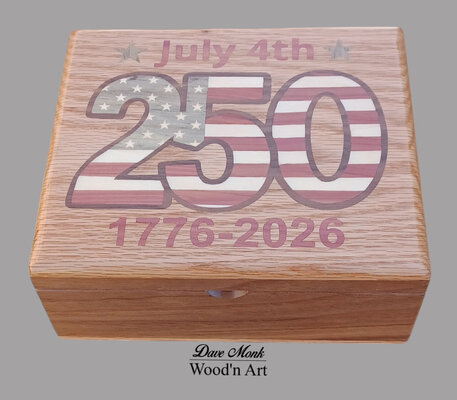
I was commissioned to design and make this box to celebrate our countries 250th year. The stars were the toughest part to inlay. I used aspen, aromatic cedar, blue pine, red oak and walnut. I wanted to use all domestic wood on this project.
- 16 replies
-
- 28
-

-

-

-
They will fall through. I put glue on the sides of the pieces and glue them in. I try to make my cuts good enough that there is little of no gap.
-
I did them at 90 so it would look good on both sides. Most of the time I use a double bevel inlay method. That is where you stack one piece on top of the other, set your saw at an angle and cut through both. Using that method you have to have an entry hole.
-
I would consider it and inlay because different pieces of wood got into another.
-
I was commissioned to design and craft this gift box. Normally I do a double bevel inlay. Many times it is hard for me to hide entry holes on certain colors of wood. On this project I made my pattern with super thin lines. I used a #1 blade and carefully cut all the pieces separately and glued them together. Walla..........no entry holes to have to try to disguise. I lined the bottom with velvet. Sorry for the blurry picture. Give it a try. Use 3/8" or 1/4" wood.
- 18 replies
-
- 24
-
-
-
Great execution of a great pattern.
-
Those pens are simply gorgeous. I have never seen anything like them.
-
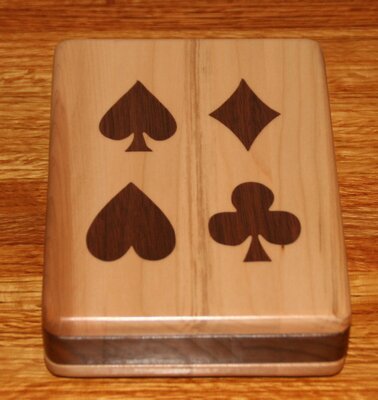
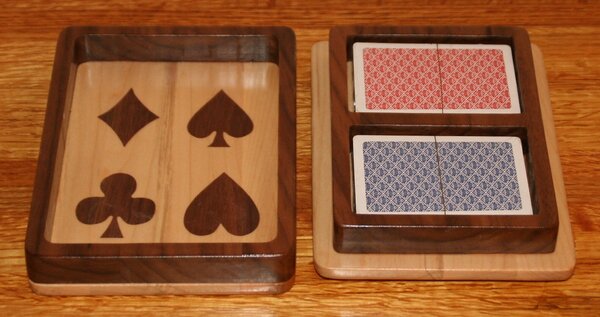
Not quite sure what you are wanting. Are you wanting the card symbols on the end of the round box that I made?
-
That's it. Thanks for sharing the link. I like the end of this box but men buy a lot of my boxes so I wanted a design to be appealing to both sexes.
-
Thanks. I used part of a nail.
-
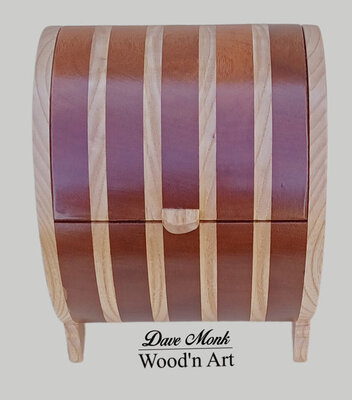
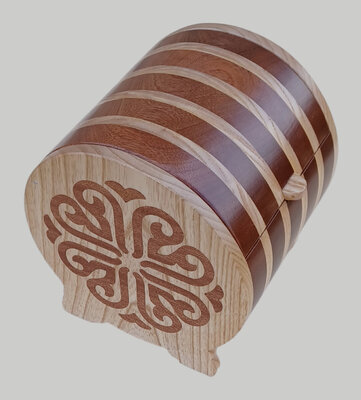
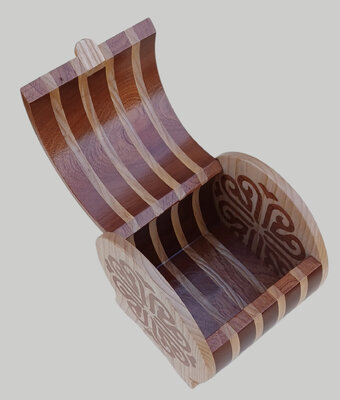
It measures 6.8" x 7.19". I started with a big block of wood that I glued the different species together for the round part. Cut it round, split it in half and then cut the inside out. I used a band saw for this. After that I glued the sides to the bottom round piece. I used part of a nail for the hinging. It is on page 18 under boxes with the name of "Flower Round Box". This is what inspired me. I totally changed it up. I wanted to make it gender neutral also. Happy to share my updated pattern with you.
-
A couple of weeks ago in Steve Good's morning email he posted a pattern of mybox2025. That inspired me to design and make this box. I used Ash and Sapele.
- 25 replies
-
- 30
-
-
-
I'm using Microsoft Copilot.
-
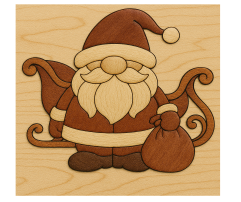
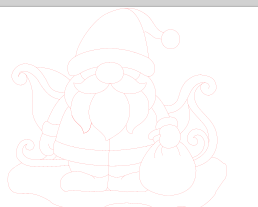
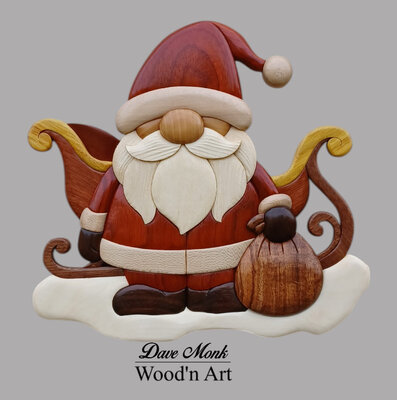
I asked for an image of an intarsia pattern of a Gnome Santa. Then I asked it to put a bag in his hand. Then I asked it to add a sleigh behind. I usually ask it several different times. It always comes up with something different. Then I pick the image I like best and put it into inkscape and trace it to make the pattern. Sometime I even combine a couple images to get what I like. The first image is what AI gave me. The second is my pattern and the third is my finished project.
-
I use it to generate images that I put into Inkscape, and then trace and make intarsia patterns.
-
You are a master at hats. You have more patients than me by tackling that using wenge.
-
I do it all the time on my band saw. I don't think I would try it on my table saw.
-

Fretsaw project: Wacky Races - The Mean Machine
Dave Monk replied to yamatetsu's topic in Bragging Rights
Awesome work.


