
.gif.3b913229ce2c6305bb30dba58a8387b0.gif)

kmmcrafts
-
Posts
9,642 -
Joined
-
Last visited
-
Days Won
142
Content Type
Store
Profiles
How-To & Articles
Scroll Saw Reviews
Clubs & Organizations
Clubs & Organizations International
Pattern Shop
Suppliers
Village University
Help Desk
Forums
Gallery
eBooks
Everything posted by kmmcrafts
-
I agree with Ray.. One thing to note too is that most any parts for these real old Excalibur saws are mostly nonexistent.. unfortunately so it's likely a buy and use saw until something breaks and then it might just be a throw away.
-

Pegas 21 Inch Arm Adjustment Assy Problems
kmmcrafts replied to btseed357's topic in General Scroll Sawing
Hmm, I'm not sure where I accessed the screw from as that was a long time ago. I remember it all going fairly easy but one part was a bit of a struggle and that was putting the washer and nut back on the rod as it's too tight of a fit to get your fingers back in there to get them threaded back on. I think I used some long needle nose plyers to get them started. Honestly you probably don't need to take it completely apart like I did if you're just going to try thread lock on it. I would take note of where the threads enter the square block and then turn it whichever way you need to access those threads and maybe get some thread lock on a brush? or ad s piece of small hose to the thread lock bottle in order to reach it down in there to the threads and then thread it back down close to the position you need to have the arm paralleled to the table so the thread lock gets down into that threaded block. I think with some tinkering around you probably can get the thread lock in there without taking it completely apart. -
Pegas 21 Inch Arm Adjustment Assy Problems
kmmcrafts replied to btseed357's topic in General Scroll Sawing
I did a repair on mine and took a few pictures of the process.. I can't find the topic to share it though but I know I posted here about the repair. I didn't replace any parts on mine like was suggested. I took it apart and just added blue thread locker to the threads on the threaded rod and it kept it from turning / adjusting on it's own. I did this several years ago and still going strong. This was on a Excalibur 21" saw.. ( basically the same saw and set-up ).. Maybe someone else has better luck finding my topic on here than I do and will share it. Meanwhile I'll try again later when I have more time. Well I found this topic but I don't think this is the one I was thinking of but there is some info here. -
I have put a listing up on my website to order some tokens / coins for anyone that is interested. Only shipping to the USA. Direct link can be found in my signature below where it says "Clock Inserts & Tokens". Website currently has no spot for filling in your personalized text so you'll need to send me a message through the link where is says to contact me right below the add to cart button. Unfortunately USPS has raised the prices considerably over the last couple years and I imagine Steve was eating that cost.. cheapest shipping I can do is around $5 and that is if I mailed it across the street from me, LOL... so I cannot match the $3.50 that Steve was charging
-
I don't know if that light bracket is standard with the new saws? My Hegner that was given to me had that bracket on it when I got it.. Too bad I didn't get a nice fancy light like that with it too.. That being said, my lights I got from Menards / Harbor Freight fit perfectly in the bracket.. As far as all the Hawk scroll saws I've had, they all have a hole in the accessory arm for the light to fit into.. Unfortunately Pegas and like saws haven't figured out a way to put a light onto the saw that is practical.. so on my Excalibur I just clamped the light to one of the 2x4's along the wall in my garage..
-
I thought it is a bit odd too so you're not alone in your thinking. Also quite odd to be brand new on the forum and not knowing a single person but drop your phone number for people to call you with their answer, LOL... Maybe that's just me because I hate giving out my phone number to anybody really, especially when you have email, and many other means of contact.
-
Just search online for the part number.. I found several of them at various sites by doing that. Look here https://www.facebook.com/reel/1039979461850624 That said this is likely a metric thread lock nut it looks like.. and likely around $0.75 at a hardware store.
-
Mike, Looks great! This was a great selling ornament for many years.. but now there is a lot of similar lower priced options, LOL..
-
Mike , Nice work! They look great.
-
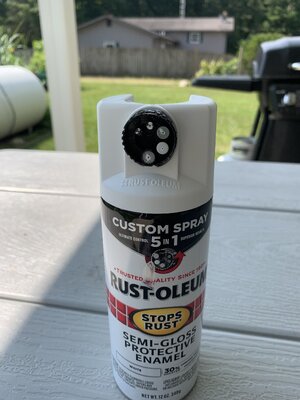
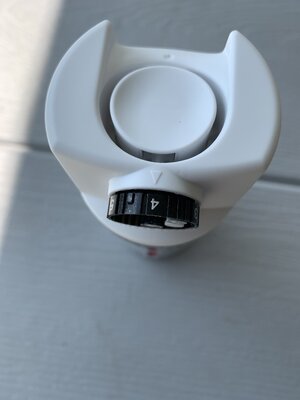
I don't watch any TV.. in fact my wife went to bed not too long ago and left the thing on and I couldn't even find the knob to turn it off so I left it on too, . Now, YouTube and forums etc. on the computer is a different story.. but I still see very few ads because I run a ad blocker program. Some sites you can't view unless you turn it off but it works very well for those YouTube ads that pop in and interrupt the video.. Anyway, back to this spray can. I like to have a nice fan spray rather than a small circular spray pattern that most cans seem to have. I will say this thing will put out a lot of paint in a hurry with it on that fan spray. Both fan sprays seem to be about the same other than one sprays vertical and the other is horizontal. The other settings on it is paint volume but they all seem to be the traditional round type pattern and you can adjust it to where there is a lot of paint coming out or a little less or a lot less. Not a fan of that spray pattern type really so I don't really use those though, I guess it could be handy to be able to turn down how much paint it's putting out. I've seen some YouTube car builders painting cars with what they call "turbo cans" and I seen some of them at my local Ace Hardware when getting this paint. Anyway, Those Turbo cans will really lay the paint out fast and a wide maybe 10 inch spray fan... great for painting large areas.
-
Maybe not so new but this is new to me. Being an autobody technician I have always disliked spray cans because you have no control over how much paint it puts out or the orientation of the spray pattern. Working on some more tea light lanterns and I like to paint the insides white to help make them a little more brighter. The 25 year old leftover spray paint I had around here finally got emptied out so I went to pick up some more and seen this adjustable nozzle style which wasn’t really anymore money like I would have thought. What little I’ve used it so far I like it much better. Anyone else seen / used these? Wonder how long they been around? The nozzle just spins around to different sizes and spray patterns similar to a garden hose sprayer that you spin the nozzle to different sprayer patterns. Anyway just thought I’d share this if nobody has seen them yet.
-
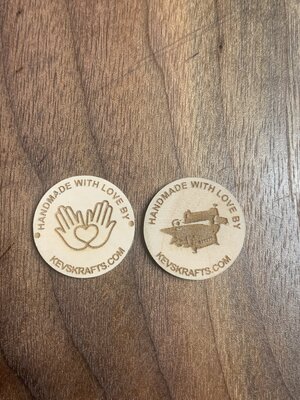
Okay, I did a couple designs and looking for feedback on these or any other suggestions. I did a real quick red paint on the heart. Not a great job as I didn’t have my glasses on but you get the idea with that.

-
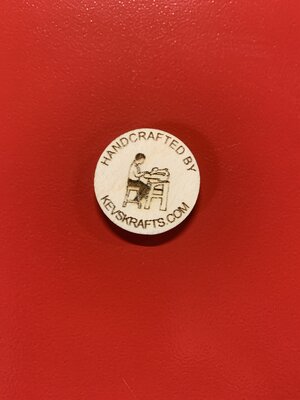
Well this is really too close to what Steve was making. But here is one design. Took me a while to figure out the text on a curve in my lightburn software but now I know and super simple. lol . Like I said I’m still pretty new to this designing thing. lol
-
So I've played around with some designs but not really coming up with anything I really like yet, as time allows I'll continue messing with designs. I did send a email out to his wife Patty today to see if I could purchase the files or if she knew of someone already making them to send me their info so I could relay the info here so everyone could get the tokens they had already been using.
-
Halloween Lantern Liner / Light Defuse Material?
kmmcrafts replied to kmmcrafts's topic in General Scroll Sawing
That is one of the unfortunate things about the small table top lasers, and unless you can build some sort of smoke extraction system they are not really safe to run inside. They are nice starter machines but many times people find out that they need to spend more for smoke filter / extraction etc.. then the cheap little lasers end up being more money than expected or they end up in a box being unused. -
Halloween Lantern Liner / Light Defuse Material?
kmmcrafts replied to kmmcrafts's topic in General Scroll Sawing
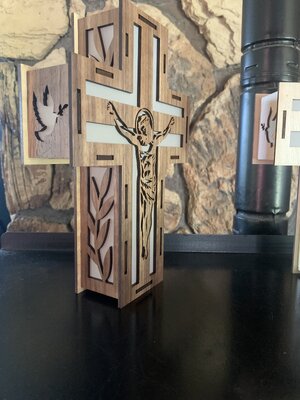
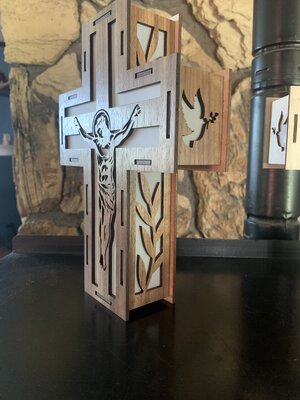
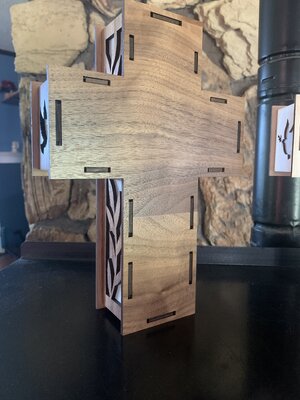
Okay, I made one from Walnut that looks better but I messed up the joints. The walnut plywood was thicker than the birch so I needed to change the width of the slot cutouts but, in the process of that I had the aspect ratio locked so it changed the length of the slots too. No big deal as it still fits together nicely without any glue used. Another mistake is the plywood is only good on one side and one of the dove pieces should have been mirrored because one sits facing one way and the other is opposite. Also only had enough walnut pieces so the wood grain on the back side goes the opposite direction. Got to order some more walnut plywood. Speaking of glue, my wife talked me into this tape glue that’s usually used for scrapbooking? Anyway this stuff works great to just roll on the glue to stick the vellum paper without getting spray glue all over. I was skeptical about using it on wood at first but wow this works great. My wife is actually right sometimes. https://www.amazon.com/dp/B0CHV1XPP6?ref_=ppx_hzod_title_dt_b_fed_asin_title_1_3&th=1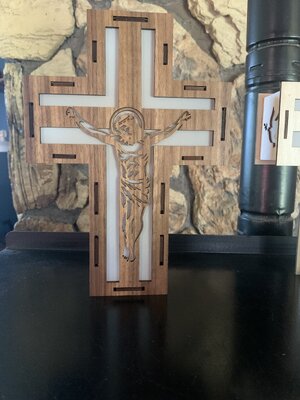
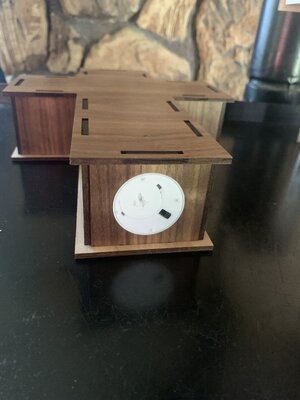
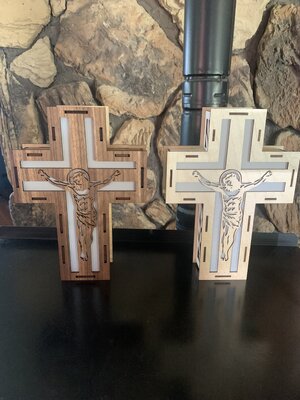
-
Halloween Lantern Liner / Light Defuse Material?
kmmcrafts replied to kmmcrafts's topic in General Scroll Sawing
I hope you can find something to get your creative side going and get yourself back in the shop.. sometimes that is a therapy session right there by just getting out and puttering with something. -
Just run across this on a YouTube video.. looks just about like my DeWalt. https://www.amazon.com/FINDBUYTOOL-13-Inch-Thickness-Helical-Cutterhead/dp/B0G62DGDWH/
-
Halloween Lantern Liner / Light Defuse Material?
kmmcrafts replied to kmmcrafts's topic in General Scroll Sawing
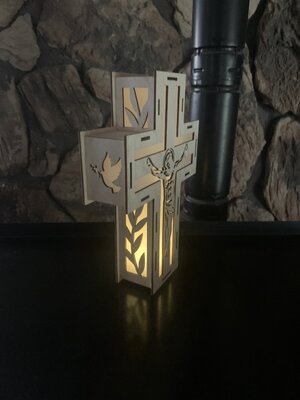
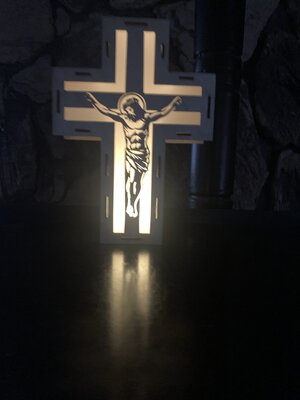
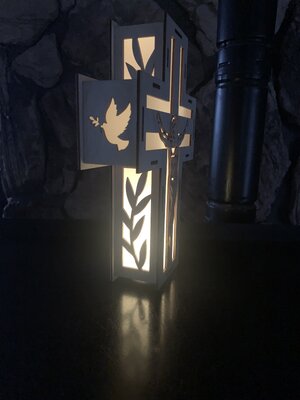
I got the pattern here. https://www.etsy.com/listing/4375695170/christian-cross-lantern-set-religious?ref=yr_purchases I made it with my laser but there is a PDF type file that could easily be printed and scroll sawn. I modified the hole for the tea light as the original design had it in the back and the hole was way too big for the tea lights I had on hand so I moved the hole to the bottom at the correct size so it is friction fit so it can easily be changed out if it were to stop working. I intend to make this from Walnut but made this one from cheap BBply just for test fitting things etc. since Walnut is much more $$ I didn't want to make expensive fire wood. .. Oh, I also painted the inside white in hopes of brighter light reflection. This all started because my daughter got married last year and we have probably 100 battery tea lights left over from her decorations so I've been making lanterns.. Here is a few more Halloween ones. LOL. Now I need to add the vellum paper to these.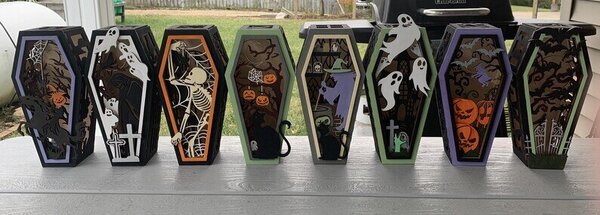
-
Halloween Lantern Liner / Light Defuse Material?
kmmcrafts replied to kmmcrafts's topic in General Scroll Sawing
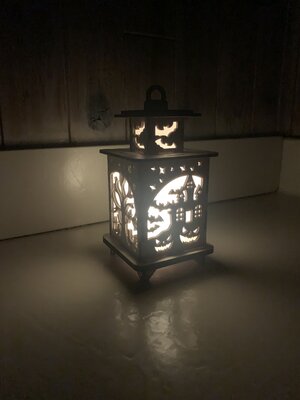
So I made another lantern that isn't Halloween themed since I'm waiting on the color vellum paper. I thought the white would look good on this one. I have to say the paper is much nicer to work with then the paraffin paper I first used and I think the vellum will outlast it by a long shot just by the feel and how heavy it is. It doesn't show up great in the pictures because it's light outside but, looks great in the darker room.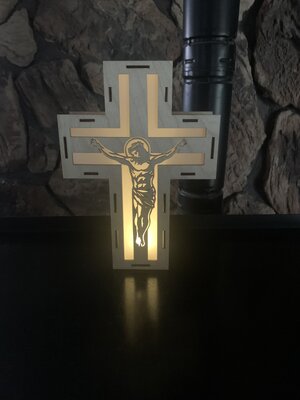
-
Halloween Lantern Liner / Light Defuse Material?
kmmcrafts replied to kmmcrafts's topic in General Scroll Sawing
Nice job of those! -
Halloween Lantern Liner / Light Defuse Material?
kmmcrafts replied to kmmcrafts's topic in General Scroll Sawing
So today out and about shopping I we went to Michael's and I bought a pack of the vellum paper.. now that I have felt how strong the paper is etc. I now ordered a variety pack from Amazon. Unfortunately, I never found any color options anywhere local which is why I ordered it online. Didn't want to order it until I was able to inspect it in person to see exactly what vellum paper was since I had never heard of it before now. Much better stronger paper than the parchment paper I used in my first lantern. Can't wait to try the orange on my lantern and see how the other colors look too. This is the sample pack I ordered. There is some other sample packs with other colors too but this had colors I thought I'd use best for my projects. https://www.amazon.com/dp/B082CVYBVR?ref_=pe_125775000_1044873430_t_fed_asin_title -
Halloween Lantern Liner / Light Defuse Material?
kmmcrafts replied to kmmcrafts's topic in General Scroll Sawing
Yeah, after looking more into the stuff I did see the color options.. I thought about a yellow or orange for the Halloween stuff and greens and reds for Christmas lanterns. The one issue I have so far is... nobody locally has the colors in stock so I guess I'm going to have to order a sample pack of all colors to find what ones I like since I can't go "look" in person to see the actual colors. Also thought maybe paint the lantern black with orange vellum paper etc.. I don't know.. so many options now, LOL -
Halloween Lantern Liner / Light Defuse Material?
kmmcrafts replied to kmmcrafts's topic in General Scroll Sawing
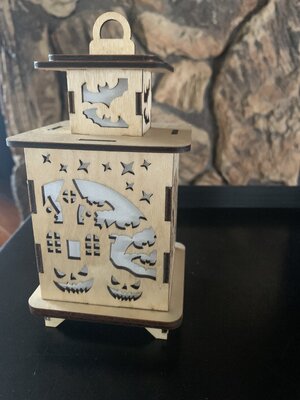
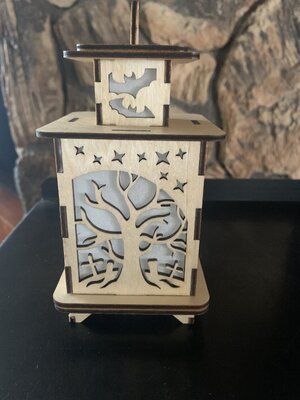
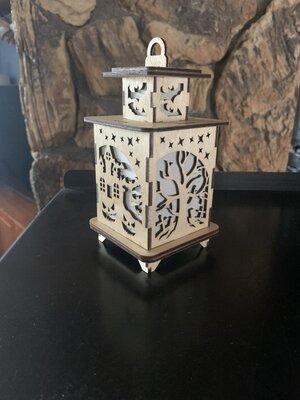
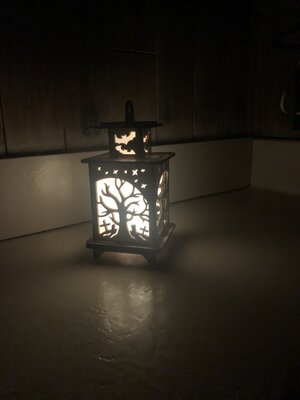
Well, I think the parchment paper my wife has worked well for making the bright tea light to not glare too much. I don’t have a before the paper photo but it was quite bright and your eyes was drawn to the flickering tea light instead of the actual cutout. I think the vellum paper is maybe a heavier more durable material? I wasn’t really sure how to attach the paper so I sprayed the 3M77 spray adhesive onto the back of the wood and stuck my already cut to size pieces of parchment paper to them. Not sure how this would hold up to dusting / cleaning in the long run but I achieved my goal of defusing the light. Meanwhile I’m on the lookout for a better product so I can sell some of these with some confidence of better quality.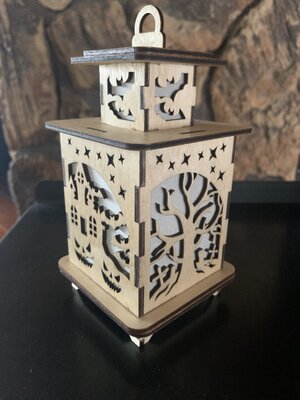
- 24 replies
-
- 13
-

-

-
Halloween Lantern Liner / Light Defuse Material?
kmmcrafts replied to kmmcrafts's topic in General Scroll Sawing
Well, I asked this question to Ai and it says Vellum Paper, wax paper or more durable and expensive acrylic.. Never heard of Vellum paper so had to ask about that and where to buy it etc. Since my wife has wax paper in the kitchen I'm sure she won't notice it's missing right? I'm going to give that a try just to see if I like it or not. If I like it and decide to try to sell some I'll likely get frosted acrylic or a orange tint for them.


