


Ken Lotts
-
Posts
211 -
Joined
-
Last visited
-
Days Won
5
Content Type
Store
Profiles
How-To & Articles
Scroll Saw Reviews
Clubs & Organizations
Clubs & Organizations International
Pattern Shop
Suppliers
Village University
Help Desk
Forums
Gallery
eBooks
Everything posted by Ken Lotts
-
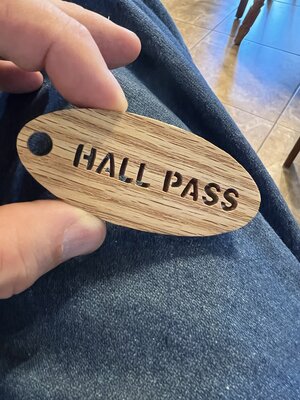
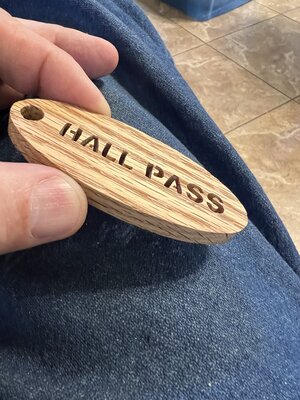
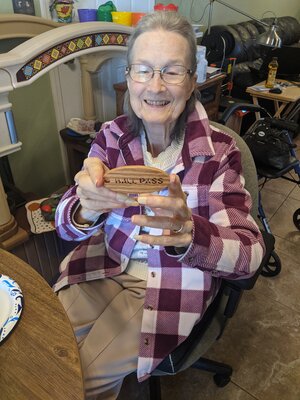
There is a small story associated with this piece... Sharon and I took in her mother after her heath declined. During that time I developed a bit of light hearted banter with her by asking if she had a hall pass when I saw her walking down the hall. It was just a way to break the ice and get her to smile. At one point I decided to go ahead and just make her a hall pass. It was hilarious. She kept it on her possession and was quick to flash it at me everyday. It was a simple enough project.. I am pretty sure I used Steve Good's pattern maker app.. Scroll saw for the win.
- 8 replies
-
- 16
-

-
Interesting that you asked that because the jigsaw pattern is a big deal even in the commercial world of puzzles. I got my pattern by doing an online puzzle with my own image which was solid white. The trick is do not complete the puzzle by adding the final piece because it will erase all your lines. Once you get to the last piece, do a screen capture. Here is what a screen shot of that would look like with the missing piece: I am going to eventually try my hand at using inkscape to make a better pattern with better variations similar to puzzles that I buy but that will take some time to master.


-
Thanks Yes. I use spray adhesive and I spray both the wood and the back of the picture. I am still experimenting to find stronger and better ways but in general spray adhesive works ok for me. I put the pattern on a dollar tree poster board and tape it over the picture. There is a bunch of little gotchas I learned after doing so many puzzles.. One is taping rows back together as you go. BTW, I have found that the FD PSR 2/0 blade cuts best giving excellent control. I tried the MG 2/0 but immediately went back to the FD PSR. I think that if you try to get too many cuts with the same blade, the crisp picture edge suffers slightly.
-
Thanks! Yes it is of Sharon (my wife)
-
I have cut a bunch of puzzles for gifts lately .. many for the grandkids and many for family and friends This is the largest I have attempted to date. It is 16" x 20" using 1/4" BB (285 pieces cut out on Hegner using FD PSR #2/0) I just used a cell phone snapshot that I had enlarged. Lol! Anyhow.. I used the divide and conquer technique (cut it out in sections...)


- 15 replies
-
- 21
-
-
 Interesting project. It looks really good too! It is a fantastic way to customize your yard. It would be nice to see how it looks when you get it installed.
 -
Wow, Interesting.. I will play around and see if I have what it takes
-
I do each column then I do the individual pieces out of that column. I do not tape anything back together as I go. Here is a shot of what that looks like... (as I was doing the simple 35 piece puzzle for my grandson) Once you start cutting the pieces out, the column is only held together at one end but I found that it is real easy to keep it together adequately while you cut even with a higher piece count puzzle. I purposely drift off the pattern lines to ensure that everything only fits together when using the correct piece. I use dollar store foam board to attach the pattern to and then the foam board is tapes (along the edges) to the photo board. The pattern was too big for my printer on this one so I had to tape it together. This picture is just before I taped it up for cutting (just like stack cutting). BTW, I found that it is unnecessary to wrap the whole thing in tape as just the edges is all it takes.


-
This weekend I made several simple jigsaw puzzles for the grandkids using extra thick and durable MDF board from Home Depot. I used a FD UR1 which worked super well making the pieces reasonably easy to fit together for them. They all loved them. So, today I made a 165 piece puzzle for us grownups. I decided to cut the adult puzzle pieces to be about one inch in size which ended up being 165 pieces (using Steve Good's book of puzzle patterns) I cut up an old calendar and attached one of it's pictures to 1/4" BB with spray adhesive. BTW, I suppose using a calendar image is an OK thing to do since it is for personal use rather than for sale. I glued the puzzle pattern to a sheet of dollar store foam board and taped the two together. I started out cutting it with Pegas MG 2/0 but they snapped too often no matter how I tensioned them so I went to my trusty old FD PSR 2/0 which worked excellent . Anyhow I was able to cut this 165 piece puzzle as a one day project and am pretty happy with how it turned out.


-
Wow! That is excellent. I like this!
-
Super nice.. Love the paint job!
-
Nice!
-
Very clean and elegant. Inspires me in what can be done.
-
Super professional looking work! Stunning.
-
Amazing! Great looking wall!
-
Beautiful!
-
I have cut quite a bit using Red Oak. I think Red Oak looks great. The Victorian bells I cut out for Christmas ornaments looked great in Red Oak.
-
Old classics. Janis was a unique vocal soloist. It amazes me at times when a rough voice carves out a tune of its own and tops the charts. I can think of several that have done it but she is one of the best examples. Bobby Magee, Mercedes Benz..
-
Amazing likeness! Great work!
-
Cute!
-
Great work so far! I notice that there is no pattern visible on the wood yet there are holes drilled for the next cuts.. maybe the picture is of the back side? are you penciling it directly on the wood or using paper? OOOPS just re-read your narrative.. yes, the back side. I need more coffee Lol!
-
What an interesting one of a kind project! Awesome!
-
Great idea! My scrap box is calling me Lol!
-
Great portrait!
-
Amazing detail in this. I like all your narrative, I will probably try out that Poplar framing at some point.


