


Wichman
-
Posts
1,978 -
Joined
-
Last visited
-
Days Won
48
Content Type
Store
Profiles
How-To & Articles
Scroll Saw Reviews
Clubs & Organizations
Clubs & Organizations International
Pattern Shop
Suppliers
Village University
Help Desk
Forums
Gallery
eBooks
Everything posted by Wichman
-
That's very similar to the saw I started with, and although you can get the 3" blades I would not recommend this saw and especially at that price, way too much money for what you'd be getting.
-
Welcome to the Village from SE Idaho
-
Welcome to the Village from SE Idaho I agree with Scrappile, Steve Good's site is great. But it's not 100's of patterns, it's 1,000's ( over 5,000 and counting)
-
A personalized ornament for a friend
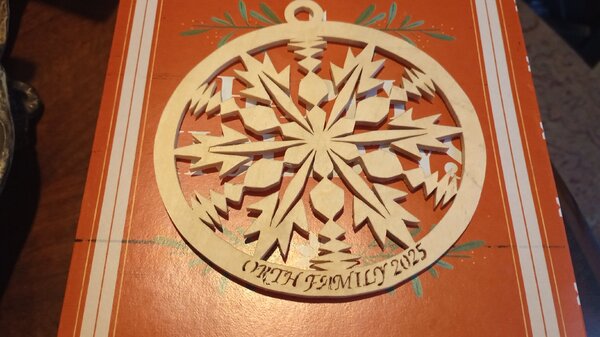
- 62 replies
-
- 12
-

-
- under the tree
- scroll saw challenge
- (and 2 more)
-

Noah’s Ark Tea-Light Stand – Original Design
Wichman replied to rafairchild2's topic in Bragging Rights
Awesome! Nice pattern and cutting. Kudo's. -
To start I would like to get some definitions out of the way, it’s a bit technical, but it’s easier for me this way. Blade width: the measurement of a blade from the front of the teeth to the back of the blade Blade thickness: the measurement of a blade from side to side. TPI: teeth per inch Tooth to body of the blade proportions. Some blade styles have teeth that make up most of the blade and other have small nubs for teeth with a very wide body, this can have a marked difference in how tight a radius they will turn and alternately how well they resist following the grain. When you are trying to cut straight lines or very gentle curves, you want: A blade that has a greater width and has more back than tooth ( example: my favorite blade the FD Polar series has a small “back” then the FD Scroll Reverse blade, so the Polar will cut a very tight radius but the SR is easier when cutting straight ) I don’t know what blades you have on hand but you can check what you have. Something to consider; because of manufacturing processes pin less blades are notably wider than pinned blades, it may be worthwhile to get a dozen pinned blades and experiment with them, just remove the pins and use like regular blades. ( For comparison the FD Polar #2/0 blade has a width of 0.023 and a thickness of 0.010, the Olson Pin End blade PRT427 has a width of 0.070 and a thickness of 0.010 so they have the same thickness but the Olson blade is three time as wide. Also, I just checked and the 0.070 is the width at the teeth, it’s even wider where the pin is. When you are trying to cut a straight line, with, the grain and the grain is pulling the blade off the line, then: More back than tooth More TPI Higher speed Regular blade ( vs skip tooth blade ) And finally, you may want to consider the idea I floated a week or so ago and use a spiral blade and a fence. Practice makes perfect, but it only took me three cuts to get a good consistent cut. And FD has a spiral reverse blade to minimize chip out.
-
I am considering building the "Hope Chest" from Cherry Tree Toys/Wildwood designs for my granddaughter. Have any of you built this item? Any issues with the pattern? Any other issues? Thanks in advance for any replies.
-
Once the finish had cured completely the char temp is the same as the wood it's on, between 400 and 600 degrees, depending on the type of wood. Unless you are consistently exceeding those temps you should be good.
-
Just a couple of points that haven't been addressed. 1. Make sure there is enough weight with the Saw to help with vibration. Adding weight to the stand is the easiest way to see if it will help. 2. Check the floor and subfloor that the saw is sitting on. I've have to move my saw around my workspace to find the best spot ( wooden floor on joists in a house built in the 1930's )
-
Wow, I must have been tired last night. This project was made from a 1" square dowel. The pattern came from Steve Goods mychain font ( the lowercase is deliberate, if you are looking for it in a drop down font list, it's at the bottom, that's just the way it gets sorted ) 90 point, about 3/4" high. Blades were FD Polar #1 for all the interior cuts, #3 for the outside, 3 1/2 hours cutting time ( some issues with the blades ).
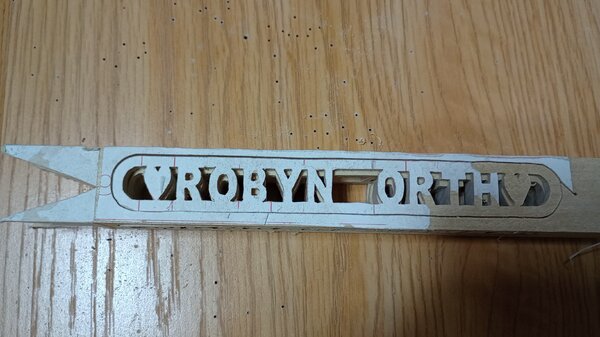
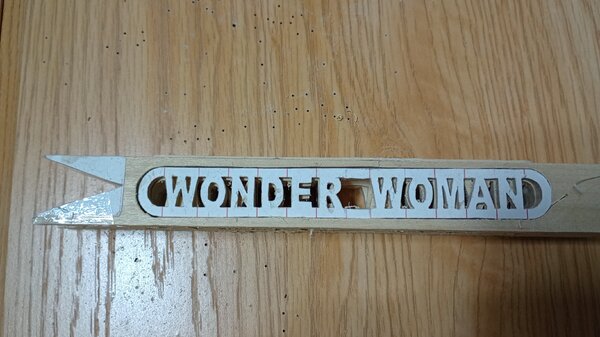
-
Paul, I used a 1" square dowel, the pattern was 3/4" so there was 1/8" left over when I cut, so 2 extra names for 2 different sides. The opposite side would be a reversed image, so I just turned the piece so you see the inside of the cut. I'll talk with my friend tomorrow to see if he wants me to laminate the extras to one , two, or four square dowels. Lots of options and I have several square dowels.
-
I can sand the scraps and have four flat pieces, two names and two Wonder woman.
-
A friend of mine's wife just got her CNA, so I thought I'd make something for her. And I got a bonus four extras :
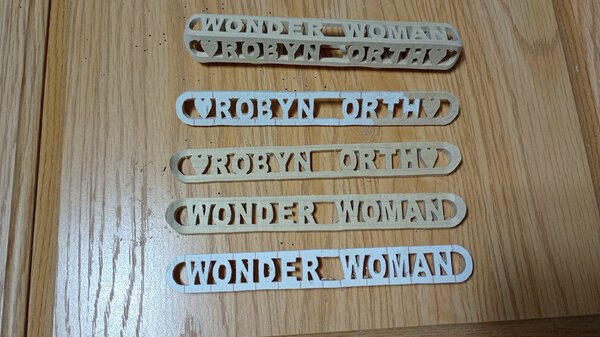
- 6 replies
-
- 10
-
-
I would urge you to at least look at the Hegner scroll saws, available with up to a 22" throat, speed from 400 - 1700 spm and the ability to change between a short stroke (.47") for more control to a longer stroke (.75") for faster cutting/cutting in thicker materials. As for blades, blades are a very personal choice, you will need to try a variety of blades to see what style and manufacturer fit you and your style of cutting. Here are some numbers to consider #2/0 blades fall in the following range, about: Width 0.023" thickness 0.010" with 30.5 TPI. Jewelers blades are available in much smaller sizes #8/0 Width0.013 thickness 0.006 ( I'm not sure if I could see those blades let alone mount one in the saw ). And finally here is an example of what a #2/0 blade can do, 1/2" pine blank, the Native American design was cut out and removed from the blank, the blank was stained for contrast and the figure glued back in, quarter for scale. Cut with a Hegner @ 800 SPM, long stroke:
-
Welcome to the village from SE Idaho
-
Welcome to the village from SE Idaho
-
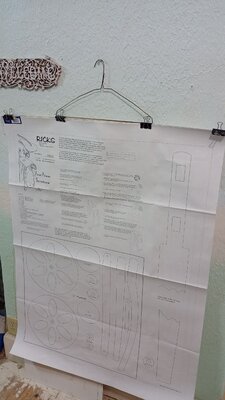
One way to store and organize the center foldouts is to use a spare closet (ha!) and hang them vertically using clothes hangers and binder clips. The picture shows my largest pattern, for a treadle powered scroll saw, that is 36" x 48" all four clips hold onto the paper patterns. The same concept can be used for magazine foldouts ( 21" x 31" ) and those should fit in most closets. You should be able to get a years worth on each clothes hanger. Just lay the pattern sheet flat ( I use my bed ) and putting the clips on is fairly easy, add a tag or a label, and hang. I used an eighth inch dowel that I'm going to replace with a 1/4" dowel
-
When you are using "trace bitmap" the preview window can be quite small and you can't see the changes being applied. If you place your curser over the vertical bar between the canvas and the trace bitmap windows, a double arrow should appear, once the image is selected click on the double arrow and drag the vertical bar to the left, this will expand the preview window and make the changes made more obvious.
-
There are some images that just do not trace well without some massaging. There are some scans from finescollsaw that are of faded yellow paper, I had to run them though GIMP and modify them to a one bit color (just black and white)(and I had to have help from my son), most of those images traced very well.
-
As for the circle issue, I feel your pain. As a work around you can select both the circle and the text; a this stage there should be two boxes, one with the text, and one with the circle. "pick" the box with the circle and move it off-canvas. The text should remain, still in the circle shape. Now you can place the text where you want. ignore the circle, do not delete, as it is off canvas it will not print.
-
There are a couple of resources here at the Village that might help you. One I could find again the other, well, I can't find it now. Perhaps someone can remember where it is. Both of the files are spreadsheets, and the research I did on databases showed that spreadsheets are easier for "small" lists (small meaning that the file doesn't slow your system down too much, so Your Milage May Vary). Here's the link to one of them, the other is for Ornaments for Charity.
-
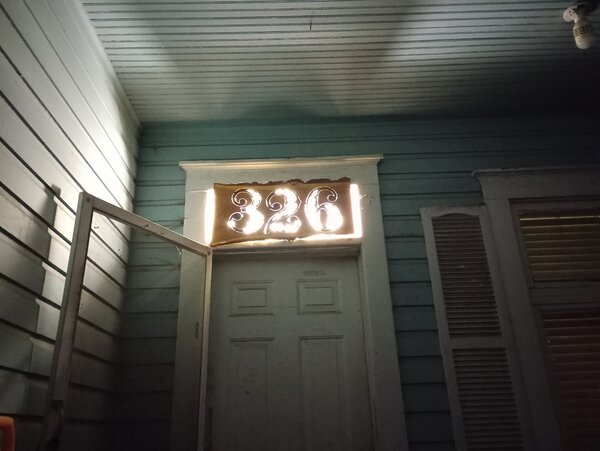
Here's a better picture of the numbers lit up. Had to go into my phone setting and play around for awhile.

-
The numbers with the back lighting
-
The one thing I didn't address is using flat blades. I don't use flat blades for this because; 1. stamped blades with a burr will change cutting angle with time, getting a consistent angle is difficult, 2. Using milled blades, if the grain is uneven or if one side of the blade hits an knot, the angle of cutting can be thrown off. In both cases the spiral blades are much less suspectable to this issue.


