


Wichman
-
Posts
1,955 -
Joined
-
Last visited
-
Days Won
48
Content Type
Store
Profiles
How-To & Articles
Scroll Saw Reviews
Clubs & Organizations
Clubs & Organizations International
Pattern Shop
Suppliers
Village University
Help Desk
Forums
Gallery
eBooks
Everything posted by Wichman
-
When you are using "trace bitmap" the preview window can be quite small and you can't see the changes being applied. If you place your curser over the vertical bar between the canvas and the trace bitmap windows, a double arrow should appear, once the image is selected click on the double arrow and drag the vertical bar to the left, this will expand the preview window and make the changes made more obvious.
-
There are some images that just do not trace well without some massaging. There are some scans from finescollsaw that are of faded yellow paper, I had to run them though GIMP and modify them to a one bit color (just black and white)(and I had to have help from my son), most of those images traced very well.
-
As for the circle issue, I feel your pain. As a work around you can select both the circle and the text; a this stage there should be two boxes, one with the text, and one with the circle. "pick" the box with the circle and move it off-canvas. The text should remain, still in the circle shape. Now you can place the text where you want. ignore the circle, do not delete, as it is off canvas it will not print.
-
There are a couple of resources here at the Village that might help you. One I could find again the other, well, I can't find it now. Perhaps someone can remember where it is. Both of the files are spreadsheets, and the research I did on databases showed that spreadsheets are easier for "small" lists (small meaning that the file doesn't slow your system down too much, so Your Milage May Vary). Here's the link to one of them, the other is for Ornaments for Charity.
-
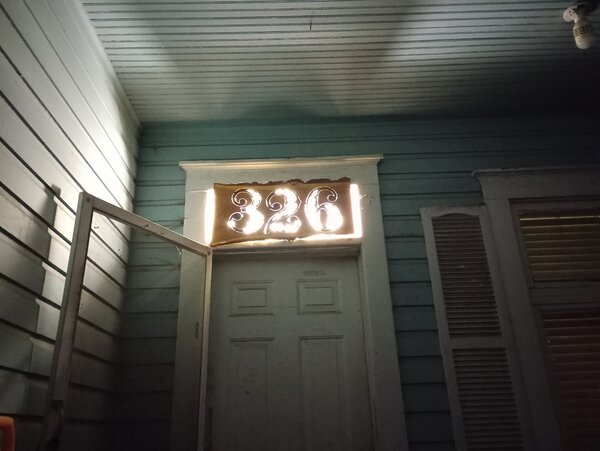
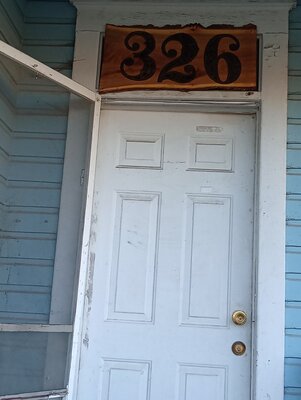
Here's a better picture of the numbers lit up. Had to go into my phone setting and play around for awhile.

-
The numbers with the back lighting
-
The one thing I didn't address is using flat blades. I don't use flat blades for this because; 1. stamped blades with a burr will change cutting angle with time, getting a consistent angle is difficult, 2. Using milled blades, if the grain is uneven or if one side of the blade hits an knot, the angle of cutting can be thrown off. In both cases the spiral blades are much less suspectable to this issue.
-
So you can cut at an angle and bypass the rear mount of the saw arm. This will allow ripping a piece that is longer than the throat of your saw, by varying the angle of the rip fence, 20 or 30 degrees at a time will allow you to get much longer blade life.
-
If you need to rip an edge, like the recent post, you can set up a rip fence on the scroll saw ( this has a much better chance of Not catching the piece and ruining many hours of cutting) ; Using a length of straight 1 x 2, clamp it to your SS table at the appropriate distance, Then using a spiral blade, carefully hold the egde to be cut against the fence and cut. You can angle the fence and be able to cut unlimited length of material (subject to huiman limitations ) If you change the angle of the fence, you can use more of the spiral blade(s).
-

Getting the Pattern design on project to paint?
Wichman replied to coldwood's topic in General Scroll Sawing
This is probably referring to the Blue jay pattern he has been working on. He doesn't want to cut all the parts out and glue them back together, but he can't freehand paint the details. So, how can he transfer the pattern easily? There are some youtube videos, and you need a laser printer, not an inkjet. -
I will add one note to this: To get a nice scrollable pattern, try this: In the word processor go to Format > Text > Outline Font Effect, select Outline Font Effect. Most fonts, including mychain, will now be in an outline mode, the color can also be changed to red ( or other ) .
-
How to curve text around an SVG image on inkscape ?
Wichman replied to Hudson River Rick's topic in General Scroll Sawing
Deleted post -
Yes, the nodes indicate the image is the .svg and scalable. The other image is the original and is much less managable is you are trying to enlarge or reduce the size.
-
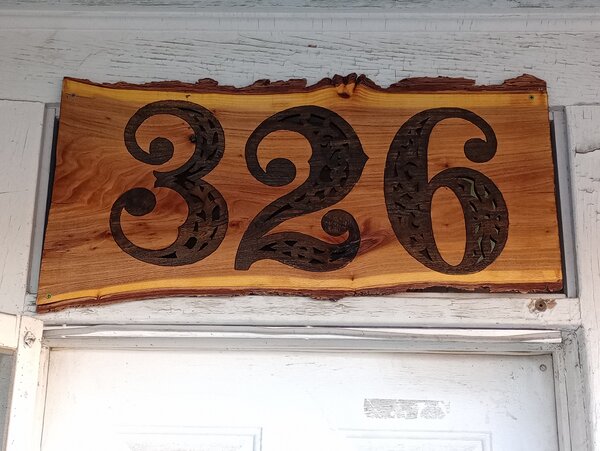
The panel is 14" tall and 30" wide 1/2" thick Siberian Elm, the numbers are 10" tall and 7" wide. The pattern for the numbers I found in the book "Classic Fretwork Scroll Saw Patterns" by Patrick Spielman & James Reidle. The blades used are FD New spiral #2/0 and 5/0, as well as FD Polar #1 for the inside fretwork. I used the 2/0 spiral to cut the outside of each number, Once the numbers were glued back in place I used the #5 new spiral to enlarge the kerf around each letter ( While cutting it was suggested that I back light the letters for more umph ). Finished with a day long dip in BLO, allowed to cure, followed by 6 coats of rattle can shellac.
- 7 replies
-
- 12
-

-
It's funny but I bought some of the HF pinned blades for a test I was running (interrupted due to stuff) and they were better than the same size/style of Olson blades, go figure.
-
They do have a way. If you go to their website and look up an issue, they have extra patterns you can dl and print. The wand stand for the magic wands is one example. So the reason must be: people who get a digital copy and post it all over the net; various forum and Facebook groups.
-
When I am dipping detailed fretwork, especially thick fretwork, I will dilute BLO and shellac 50/50 with their thinners so that the finish will flow fully into the fretwork. I will dip for a few minutes or up to several days depending on the thickness of the item being dipped. Once dipped, I allow the excess to drain back into the dipping container, when the dripping stops I wipe any excess off with towels. If I'm starting with BLO I allow it to cure until the smell is greatly reduced, using mild heat after a day or so will speed up the cure time ( I use a furnace vent ). Once the BLO has cured I dip again in shellac, repeat the drain and wipe, then allow about an hour to flash off most of the thinner ( denatured alcohol ) then put back on the furnace vent. IMHO the reason the shellac sometimes stays tacky is water trapped in the alcohol thinner, using the warm dry furnace air helps evaporate both the residual alcohol and nay water left behind.
-
An update on the pattern. I've been limping along on my phone for three days, had to replace the battery on the laptop. I've found the commercial outlet for the pattern here: https://woodenteddybear.com/products/gsa186-barrel-racer The designer of the pattern is GSA - OLD GRIZ ; Made from artwork by Julie Popowicz with permission. Wichita
-
I found this post, which lists the artists name https://www.scrollsawvillage.com/forums/topic/46897-barrel-racer/#comment-497857
-
Welcome to the village from SE Idaho
-
Very nice cutting, Kudos
-
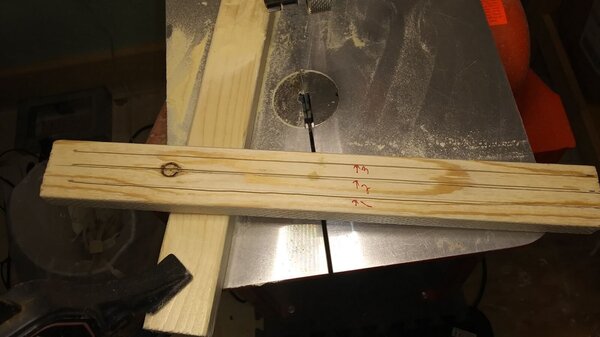
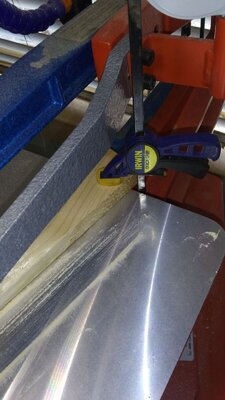
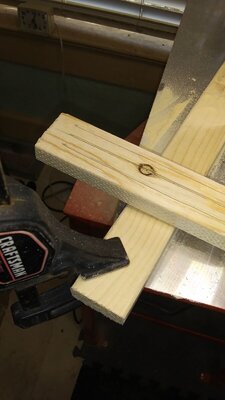
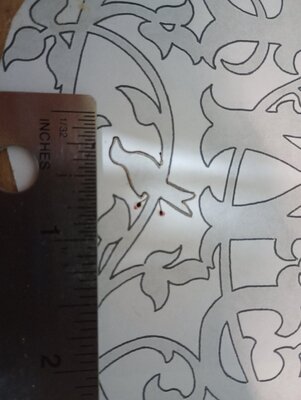
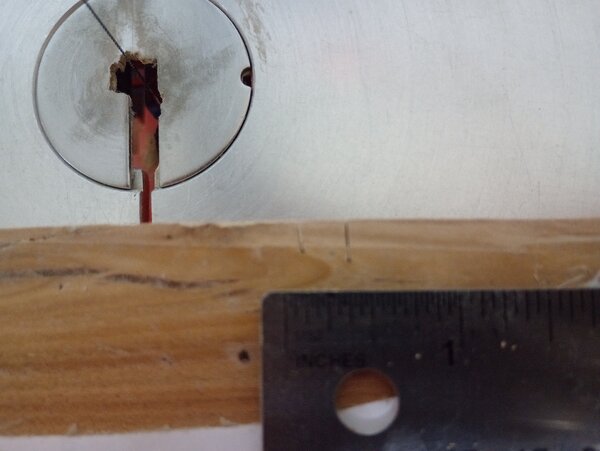
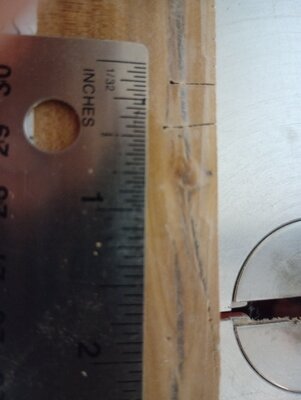
> Is there a general rule on the minimum radius for a cut vs the width of the blade or wood hardness/thickness? Am I > simply cutting my pieces smaller than I should? There are no real guidelines, there are too many variables i.e. wood hardness, thickness of the piece, speed, etc. Here are a few pictures to help you see what can be done. The wood is one piece of 1/2" Elm stacked with a 3/8" of Elm, for a total of 7/8" thick. I cut directly into a waste area and then slowly rotated the piece and came right back out the same kerf. In the first picture I used a #2/0 Polar blade, in the second I used a #1 polar blade. The saw speed was set at 1350 and I'm using the short stroke . The next two pictures show how tight a turn you can make, no extra pilot holes, I just followed the lines. I used the #2/0 blades here, the rest will be cut with FD Polar #1.

-
I keep a Can-O-Air next to the scroll saw, when I change blades I use the air to blow out all the debris from the clamp. I place the blade clamp in the holder, the wrench on top and gently tilt the clamp back with the wrench until I take out all the slop. Next I put the blade in the clamp and tighten until resistance is felt, I then pull the blade out just enough that the clamp screw doesn't move the blade; now tighten. Be careful not to overtighten the blade, and make sure the blade is square to the clamp, it the blade is not square to the clamp it will put undue pressure on the blade and reduce the longevity of the blade. To me, the puzzle blade looks and feels much like the Polar blades, the biggest difference is the Polar blades are skip tooth and the puzzle blades are not a skip tooth. You should, with practice, be able to cut a zero radius turn. I use this technique often. One practice cut I use is this: Using a 3/4" to 1 1/4" thick piece of scrap, set the scroll saw to cut at an angle ( 30 degrees works ), cut straight in about an inch, then carefully rotate the scrap 360 degrees, you should get a cone shaped "waste" piece from the bottom of the scrap.
-
I'm reading between the lines here, but I think he is talking about the blade turning 45 degrees while trying to cut the small radius's; if you look at the blade head on, and without power to the saw, turn the workpiece 45 degrees to the left, the saw blade will turn to the left. He's not pushing sideways on the blade, he's turning the workpiece to get the circle. Two complete turn's is the maximum tension according to the manual. When I use numbers to express tension I use 1/4 turns, so 4/4 would be one complete turn and 8/8 would be two. The manual states 2/4 (1/2) rotation as a minimum tension. I generally use 6/4 for my work. The hockey stick here is most likely caused by the wrong blade clamp, instead of putting pressure across the whole clamp face, there is instead a pinch point where the blade bends.
-
I'm reading between the lines here, but I think he is talking about the blade turning 45 degrees while trying to cut the small radius's; if you look at the blade head on, and without power to the saw, turn the workpiece 45 degrees to the left, the saw blade will turn to the left. He's not pushing sideways on the blade, he's turning the workpiece to get the circle.


